Installing a zipper.
Zachary Brown
Zippers are a little tricky to get right, but bearing a few tips in mind can make the process a lot smoother.
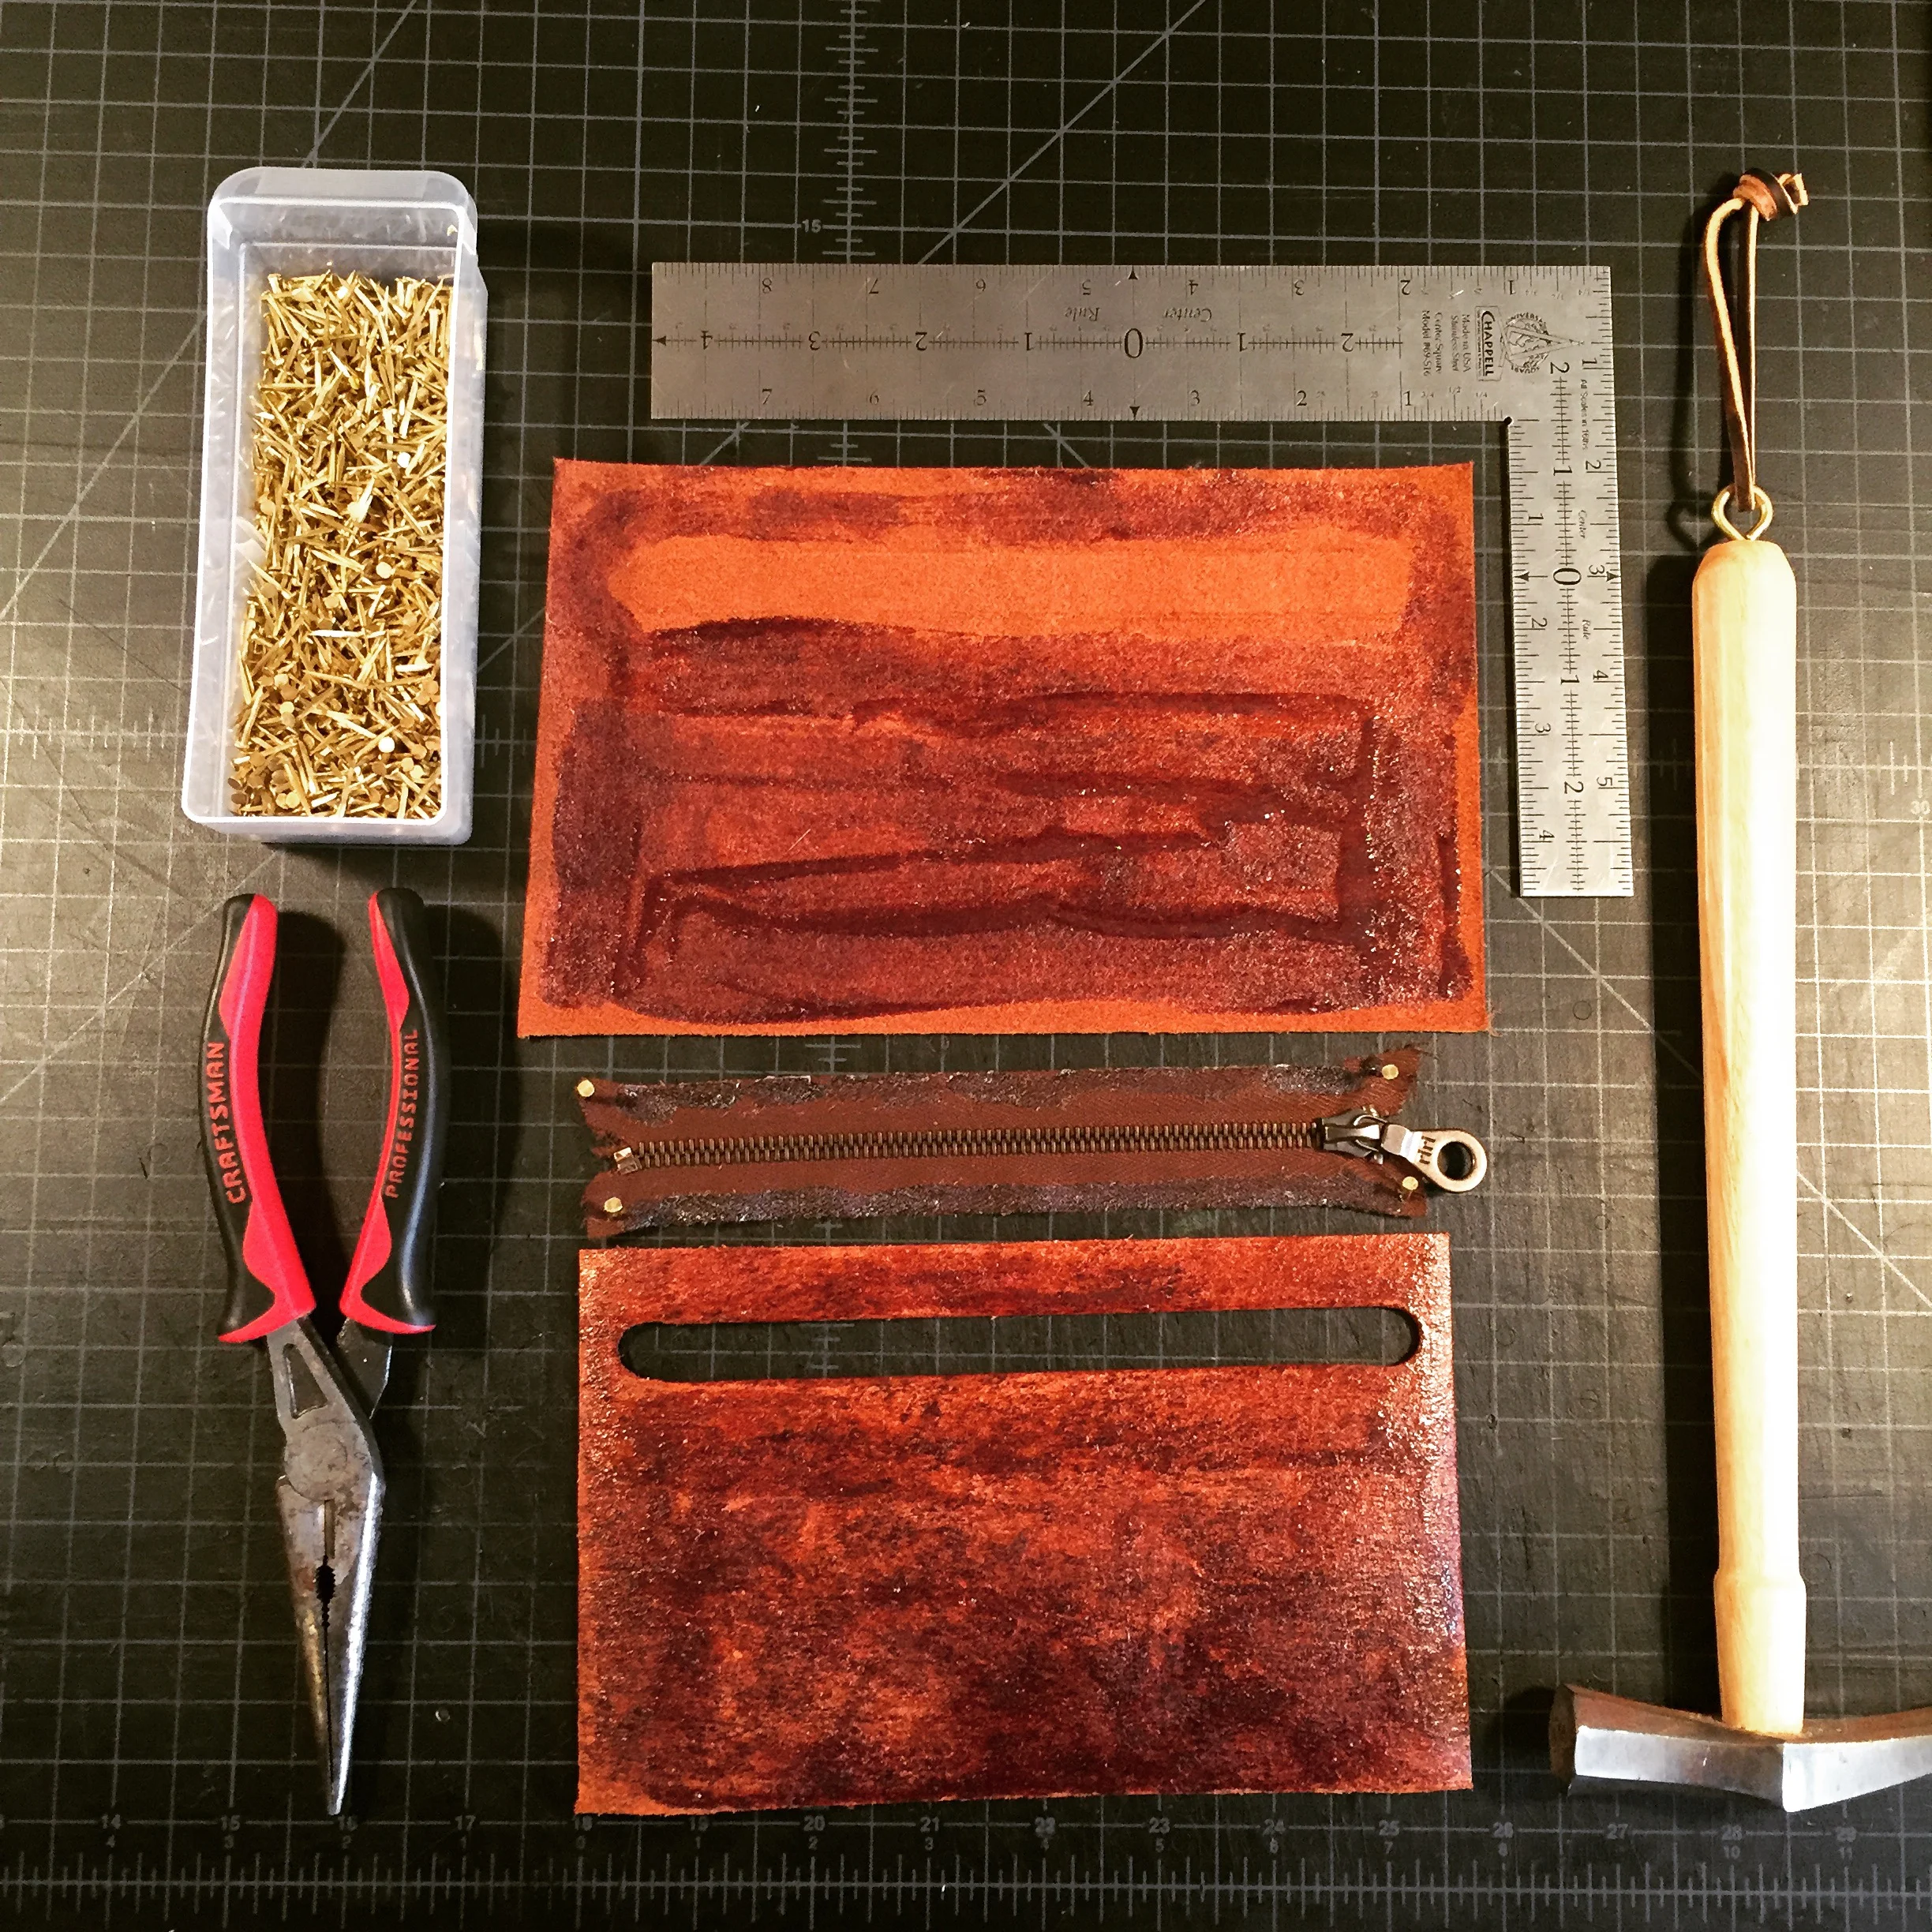
What's needed:
- A good quality zipper and all of the necessary parts including a Pull (the little piece that opens and shuts the zipper) and Stops (the parts that stop the pull from going past the end of the zipper chain) for both sides.
- Some brass shoe tacks.
- A hammer.
- Glue
- Pliers
- A common edger (not shown here, but is shown later)
- Leather! (2 pieces, one slightly bigger than the other. I'll explain why later.)
The process:
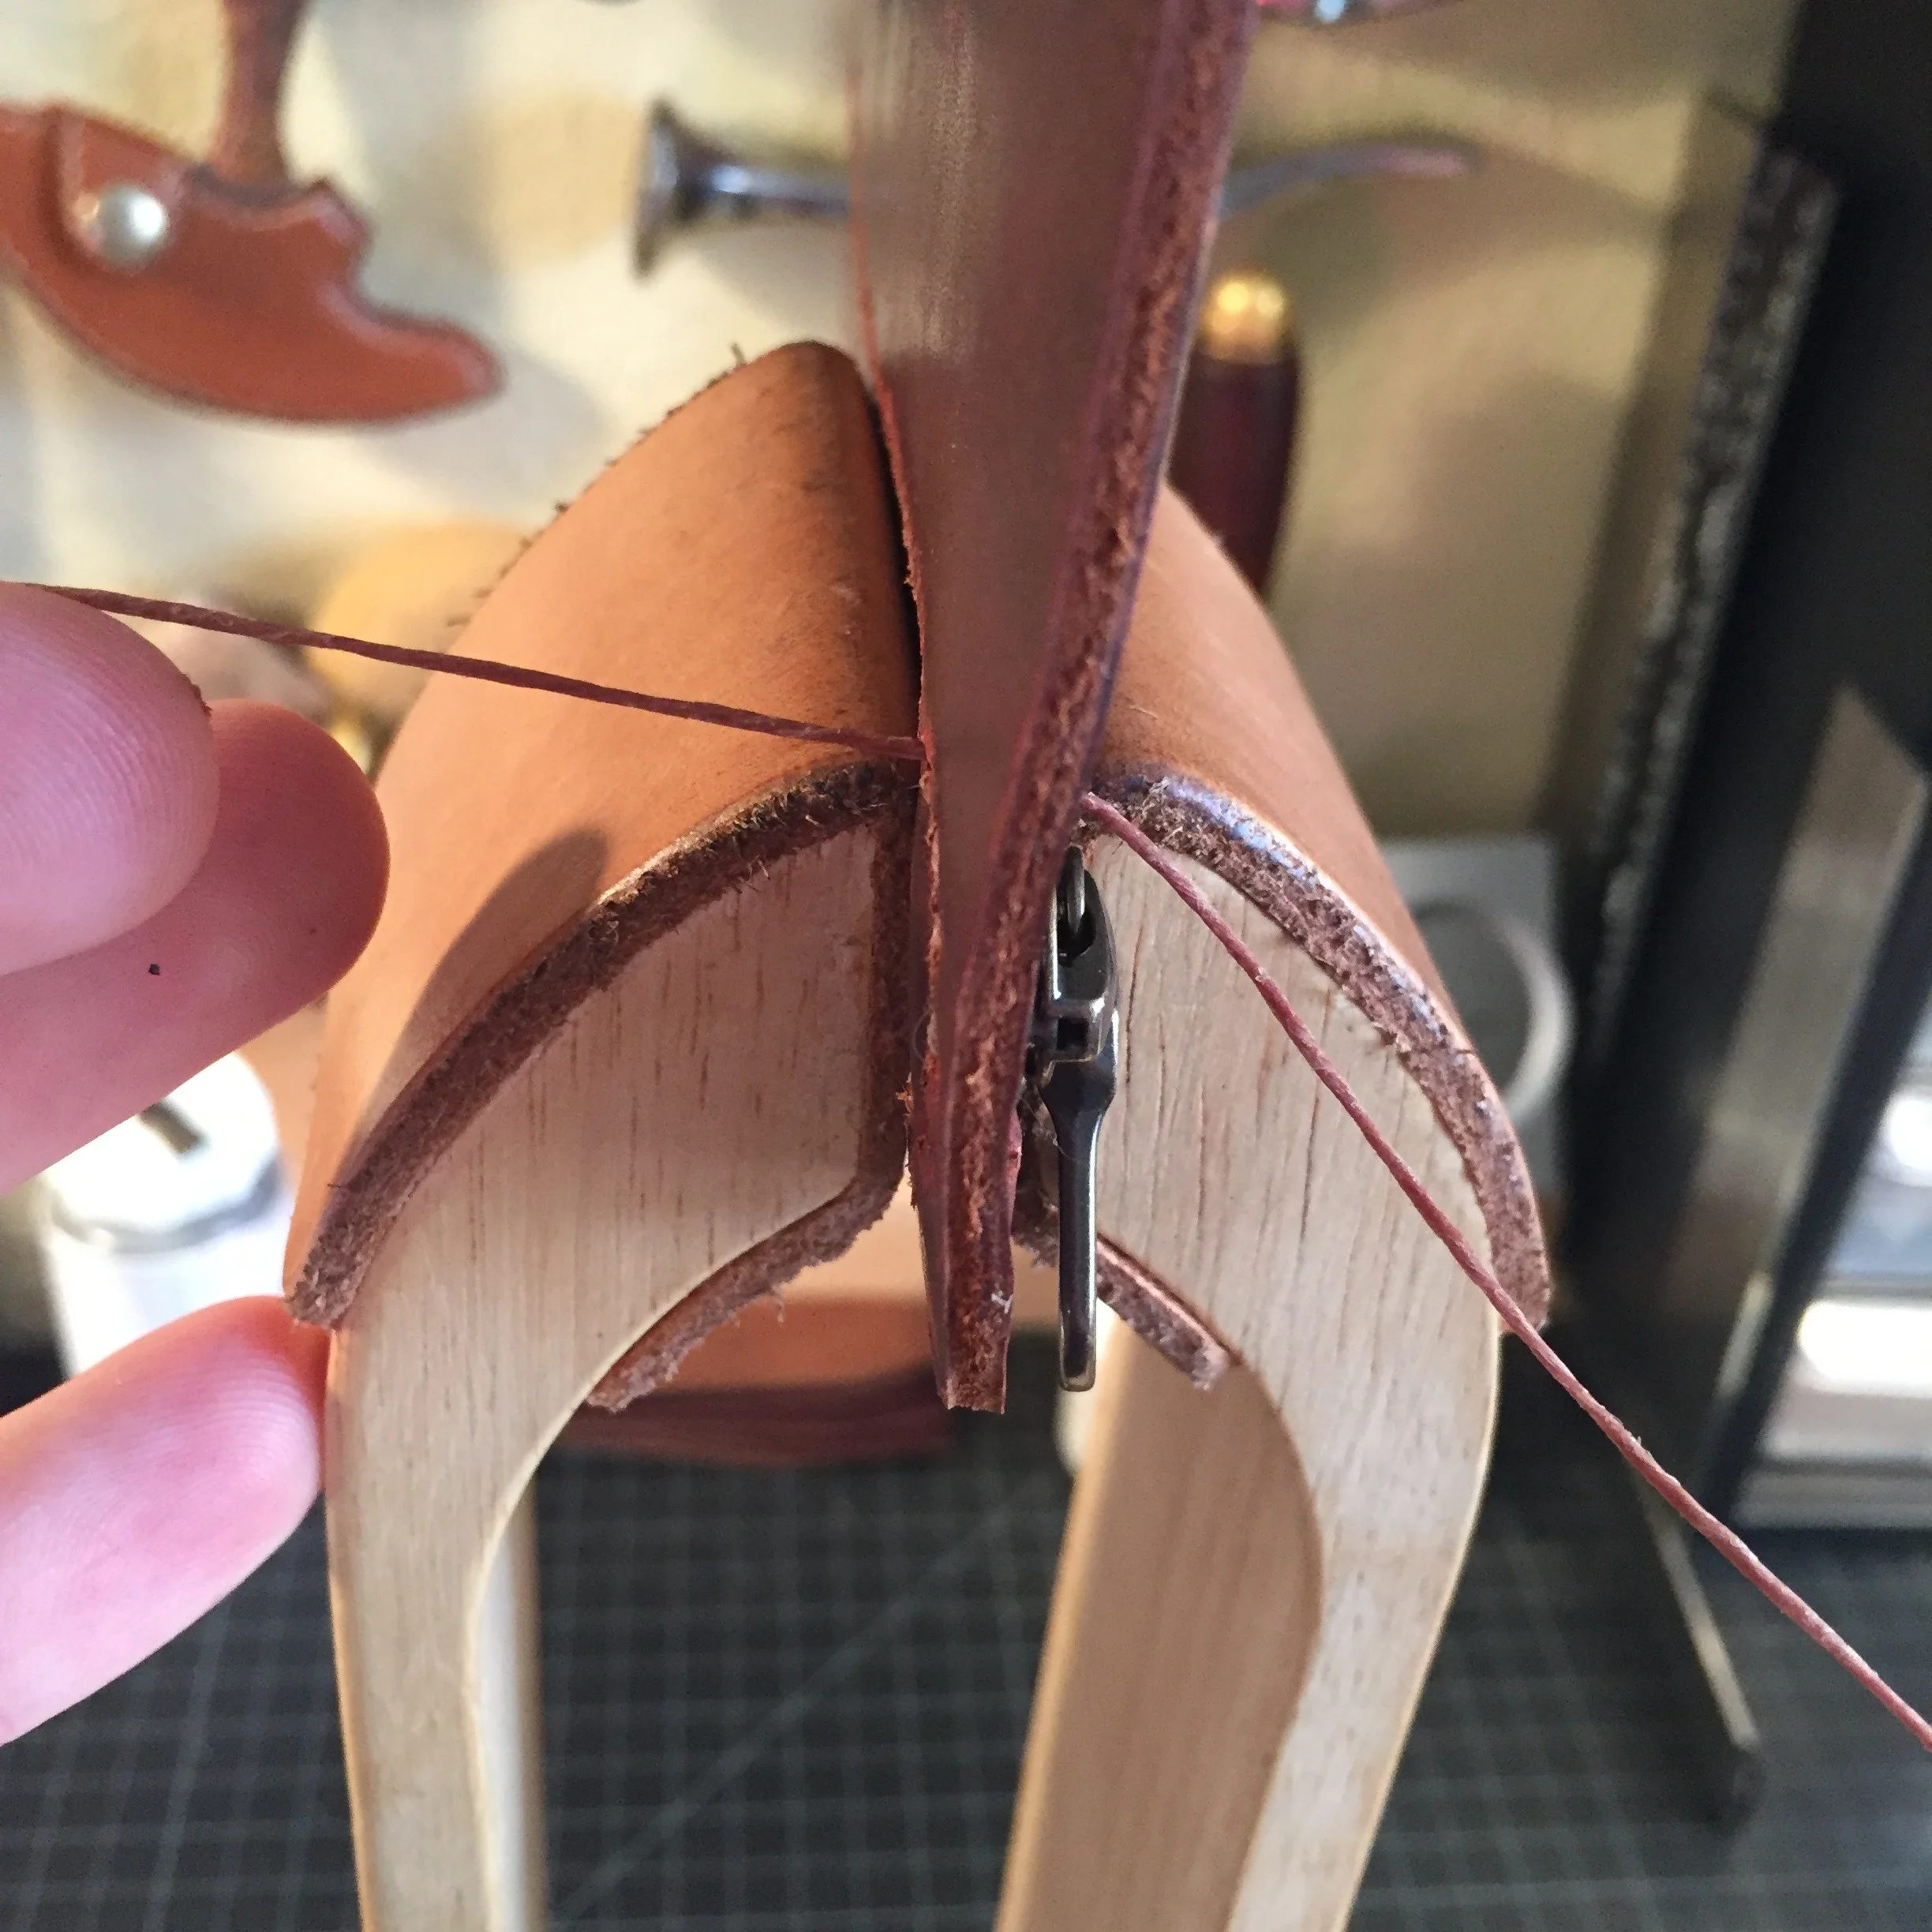
The process begins by getting the zipper hole cut in the smaller piece of leather. I try to get the hole to be 1/8" bigger than the Zipper Pull itself to give the Pull room to breathe and move freely. Once the hole is cut, the entire surface gets a coat of glue. I prefer Contact Cement. The zipper needs to be stretched out somehow, and the best way to do this is with Shoe Tacks. They're small, easy to use, and they don't get in the way (too much) in the coming steps. I get the zipper taut and put a tack in each corner of the Zipper Tape (the material the zipper teeth are attached to). Glue is applied to the edges of the tape all the way around. Once dry and tacky, the leather with the zipper hole is carefully placed onto the zipper, making sure to leave equal space on either side of the teeth. The leather is gently pressed down to make a bond, the tacks are removed, and the zipper is in place!
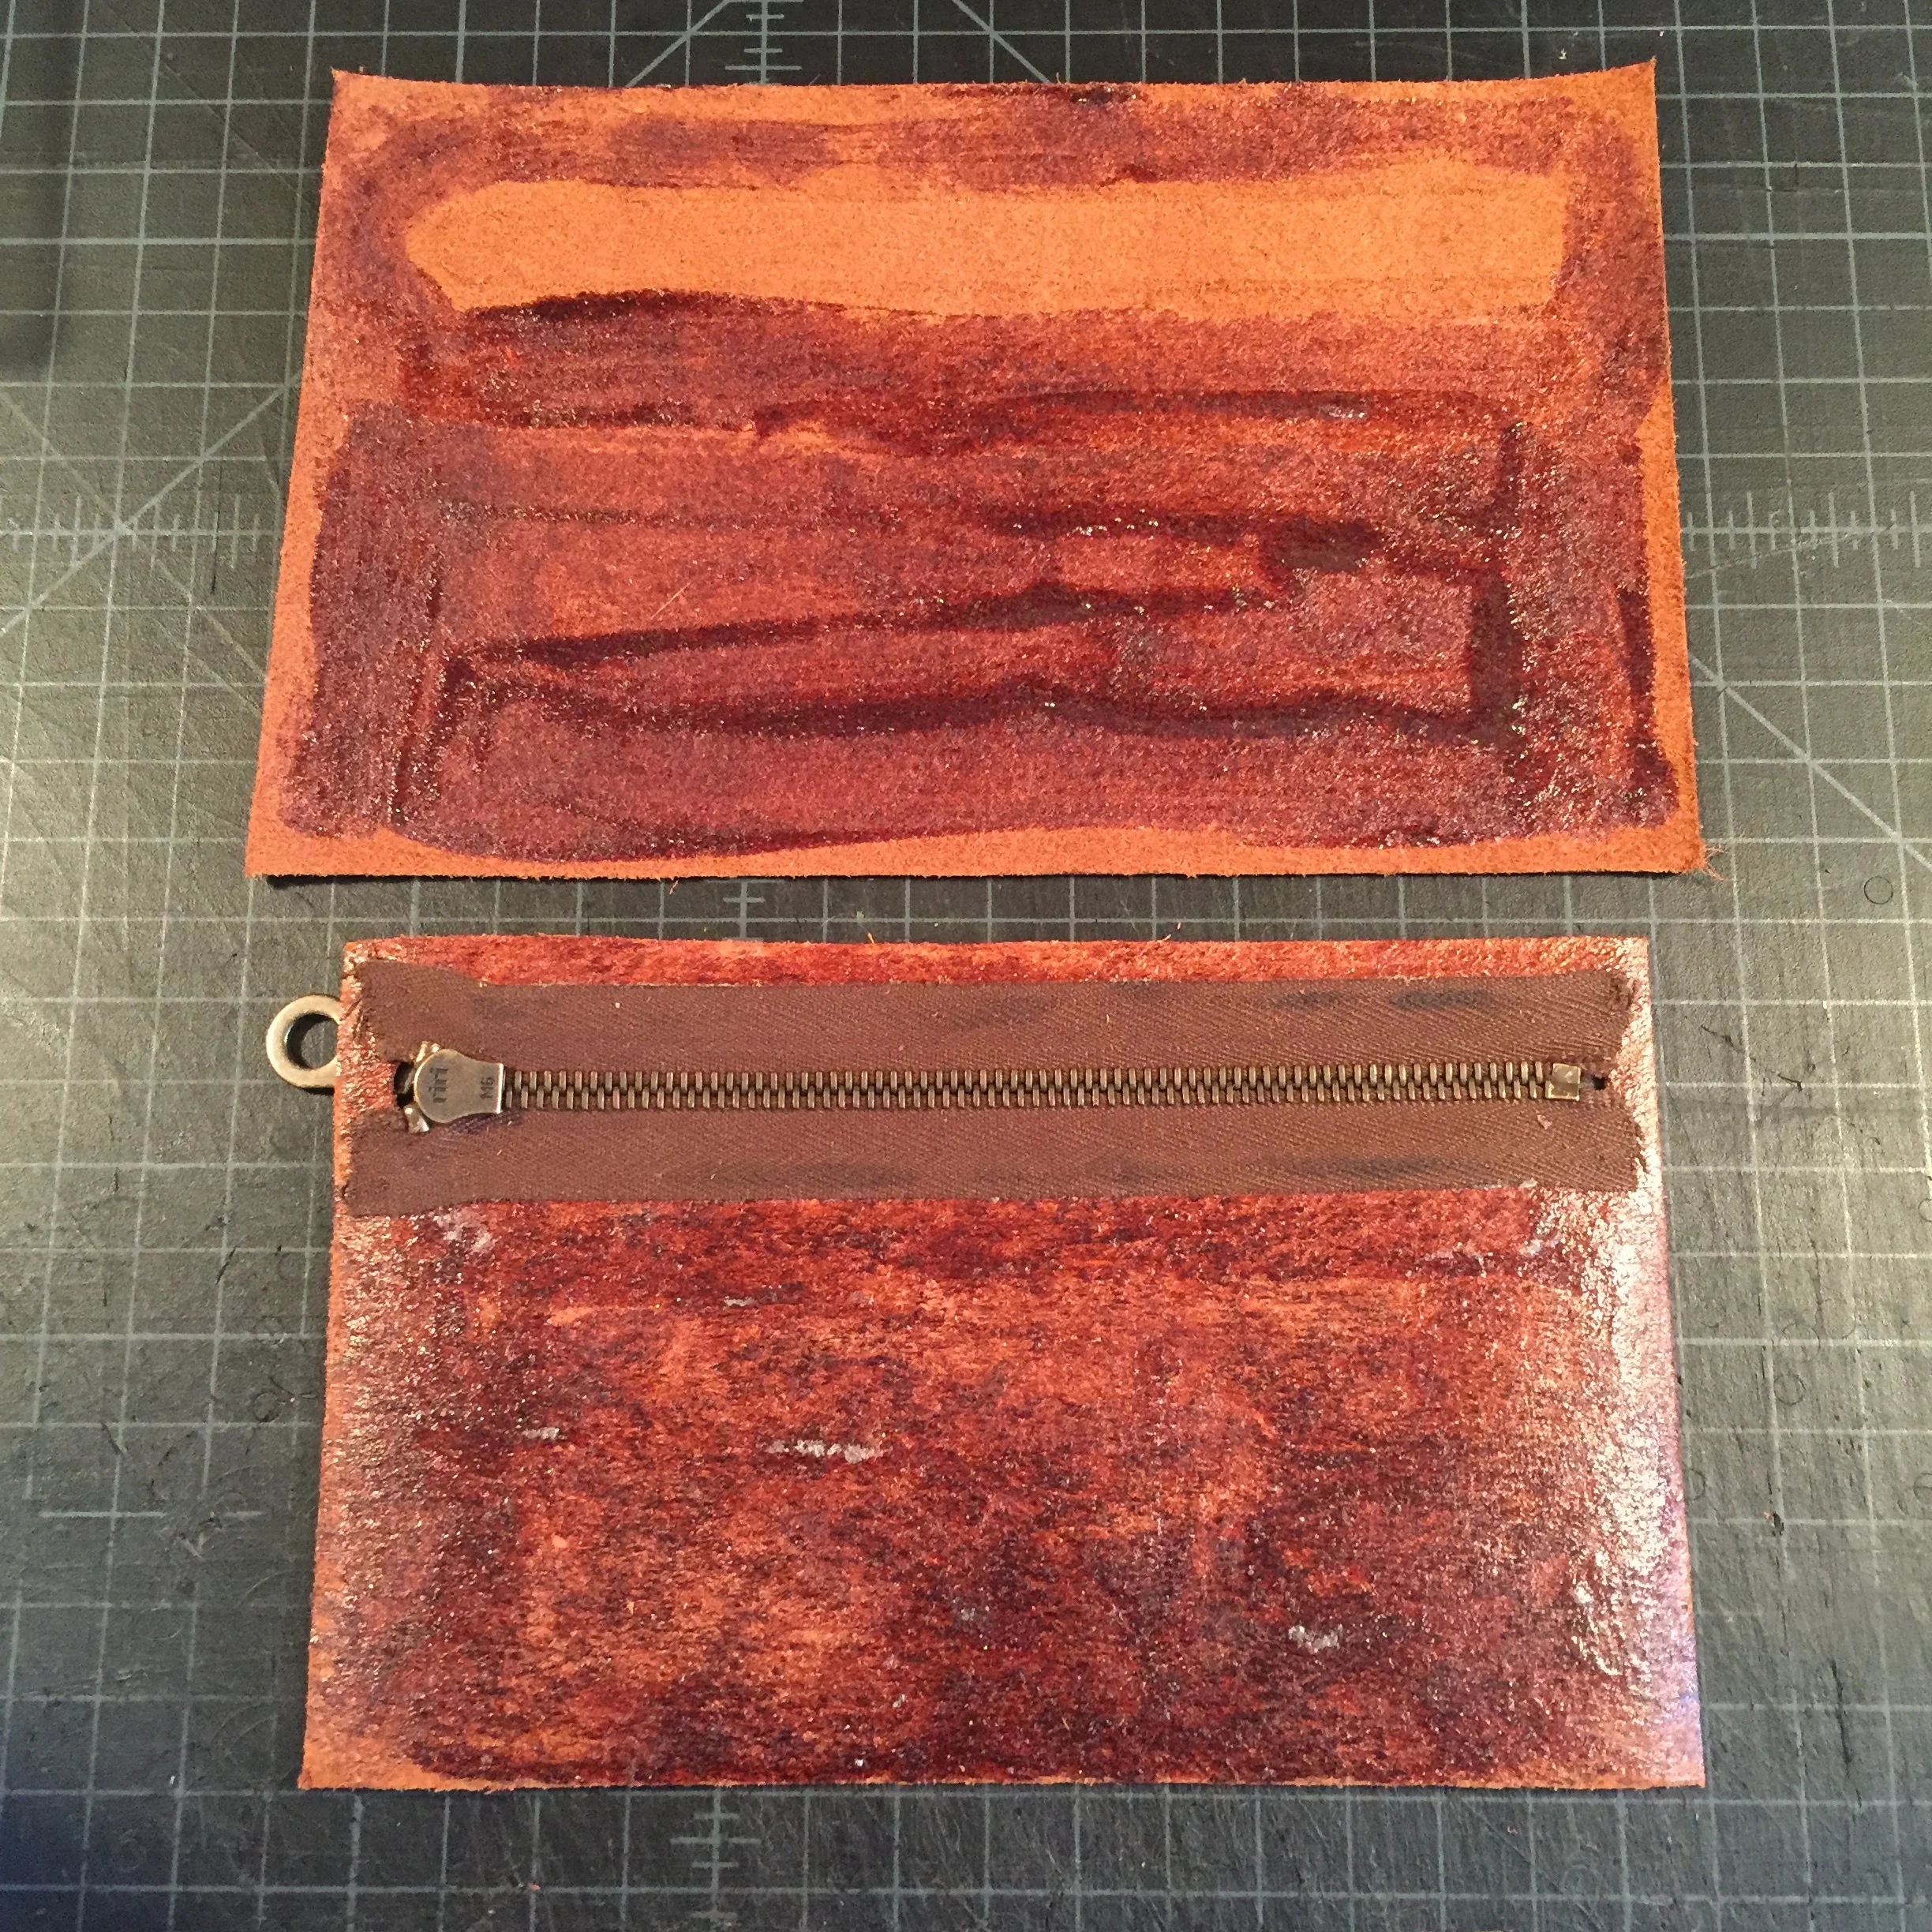
The second, slightly bigger piece of leather will be needed now. This piece needs glue all over, except for the area where the zipper teeth will go. Care needs to be taken here to measure carefully where the zipper will go, and apply glue everywhere else. This piece needs to be tacked down in the same manner as the zipper was before; taut, with tacks in each corner. At this point the leather with the zipper attached is carefully placed onto the tacked down piece by lining up the glue-free zone and the zipper. The slightly larger size of the piece tacked down keeps the tacks out of the way, and ensures a tight, straight bond with the zipper. Once the two pieces are glued together, the tacks are removed, and the slight overhang of the bottom piece can be cut away to match the size of the smaller piece, and then cut to desired shape .
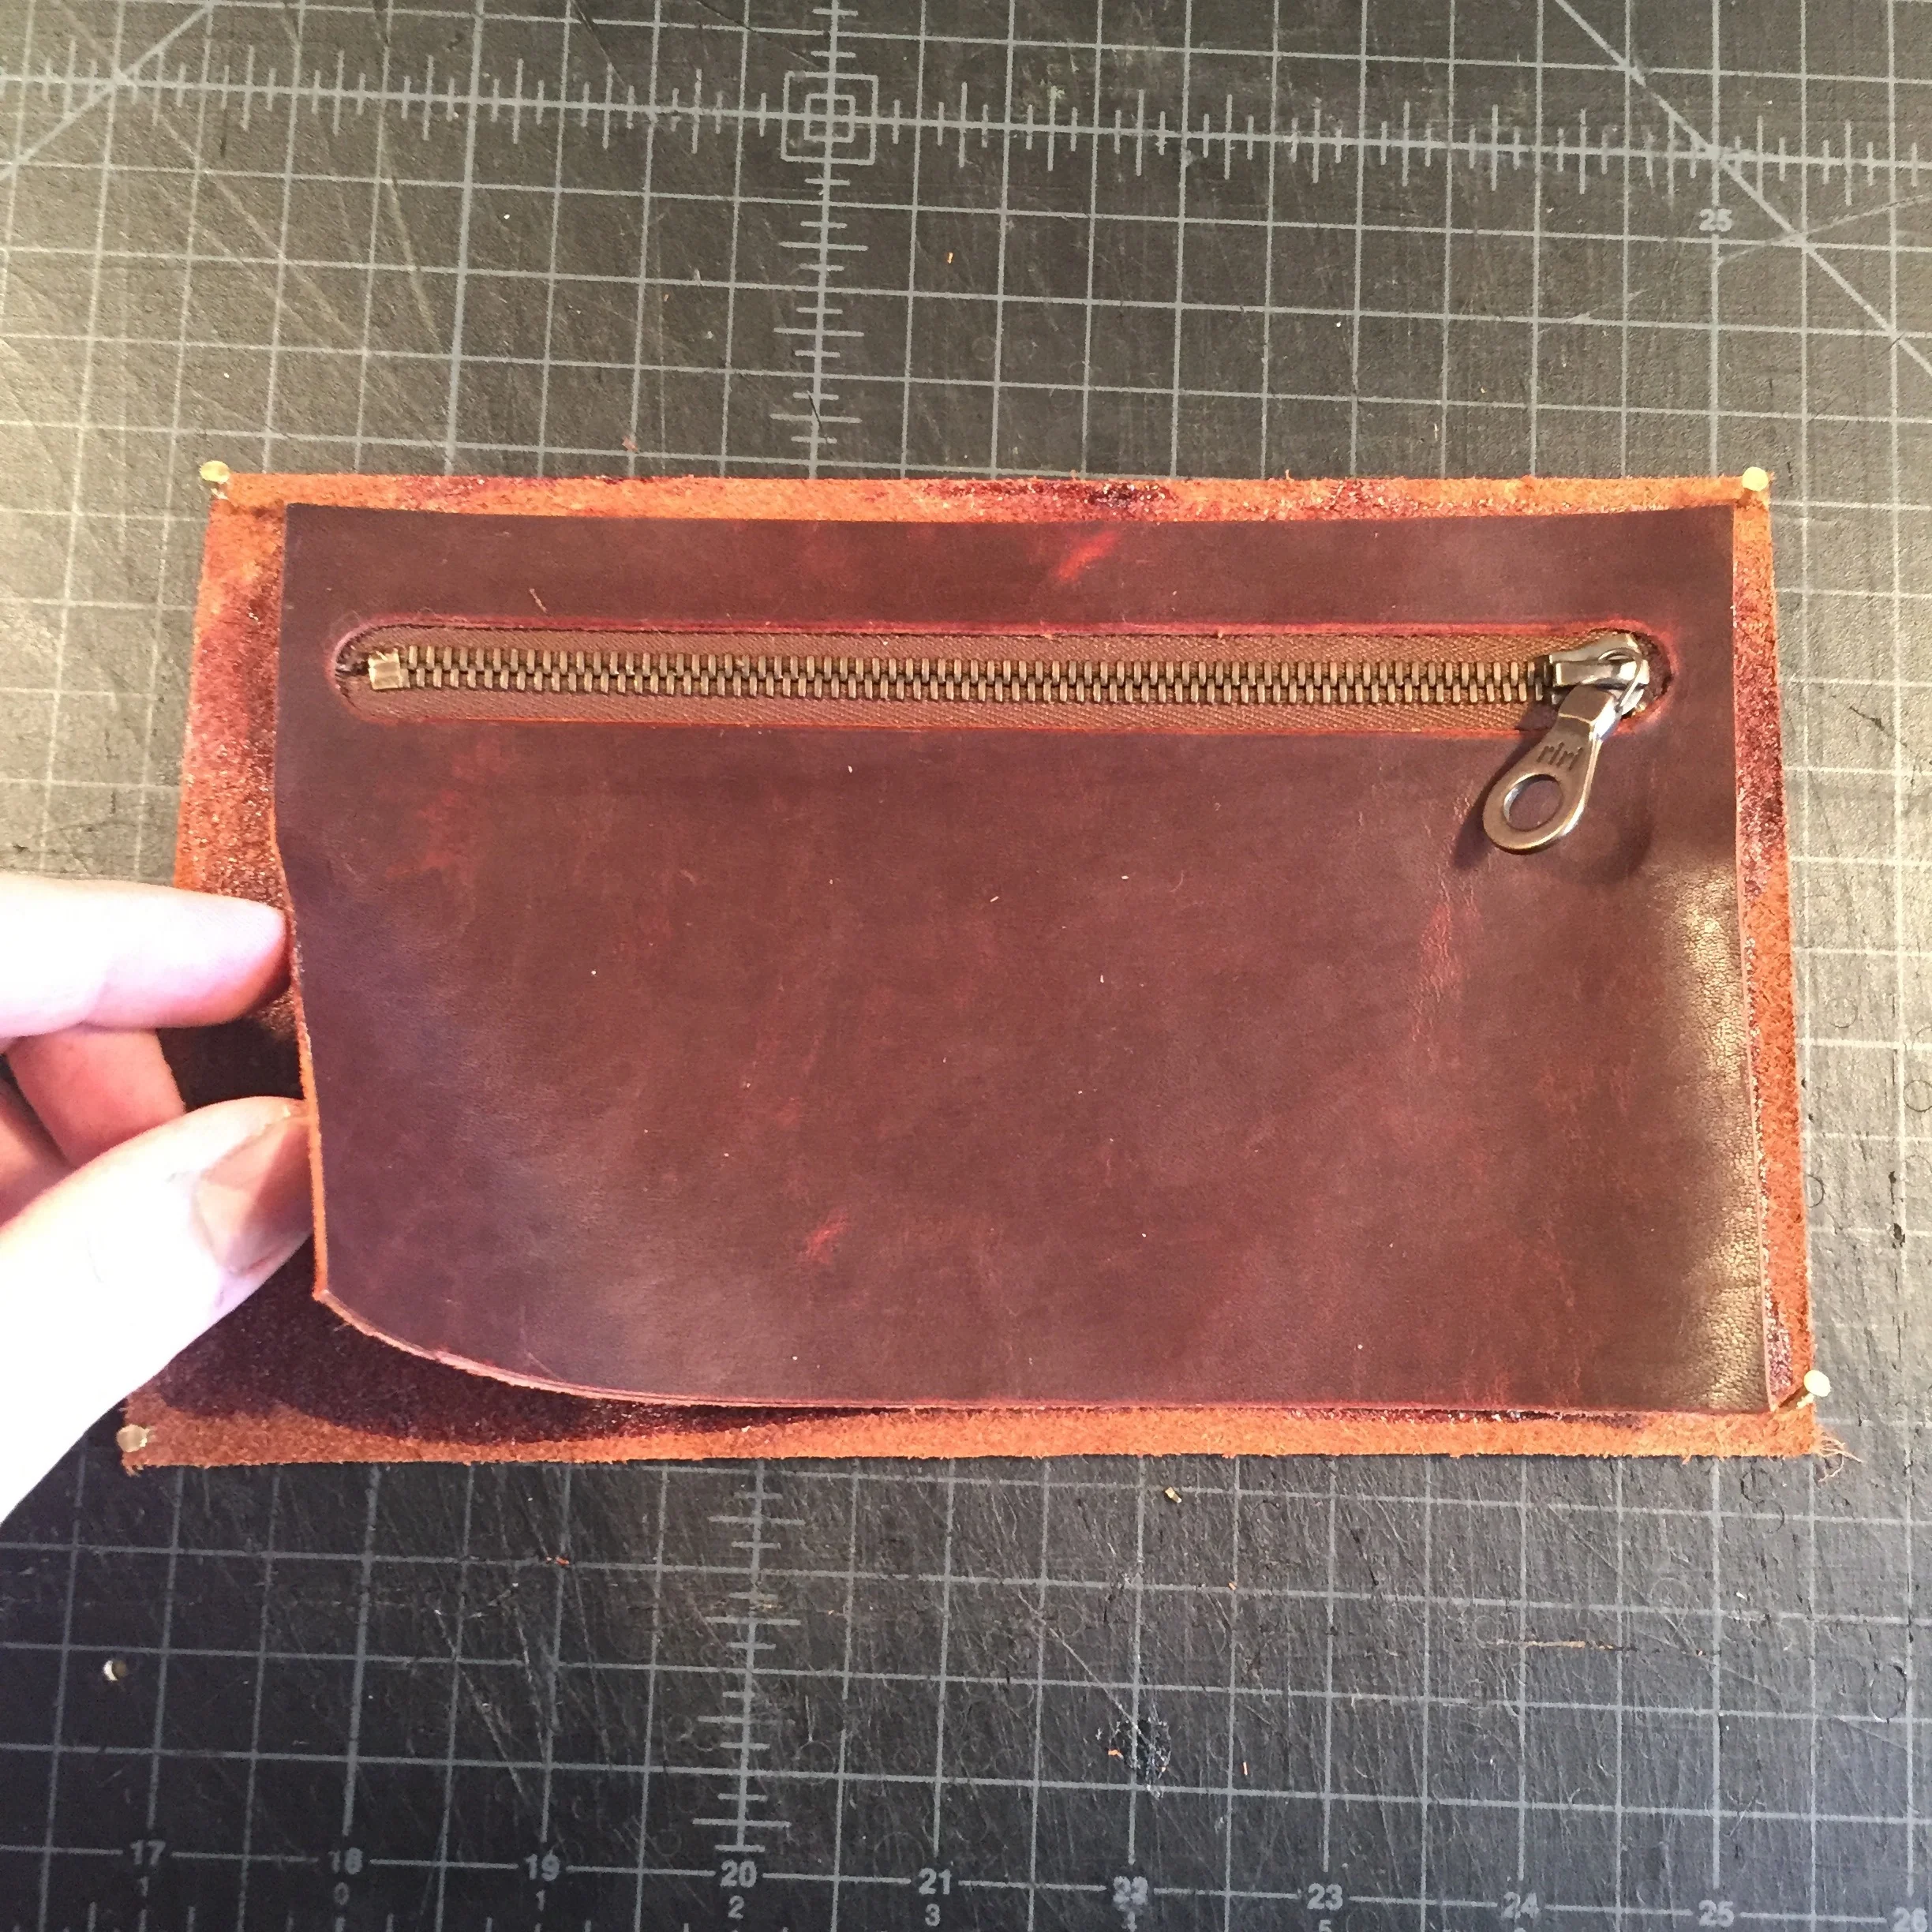
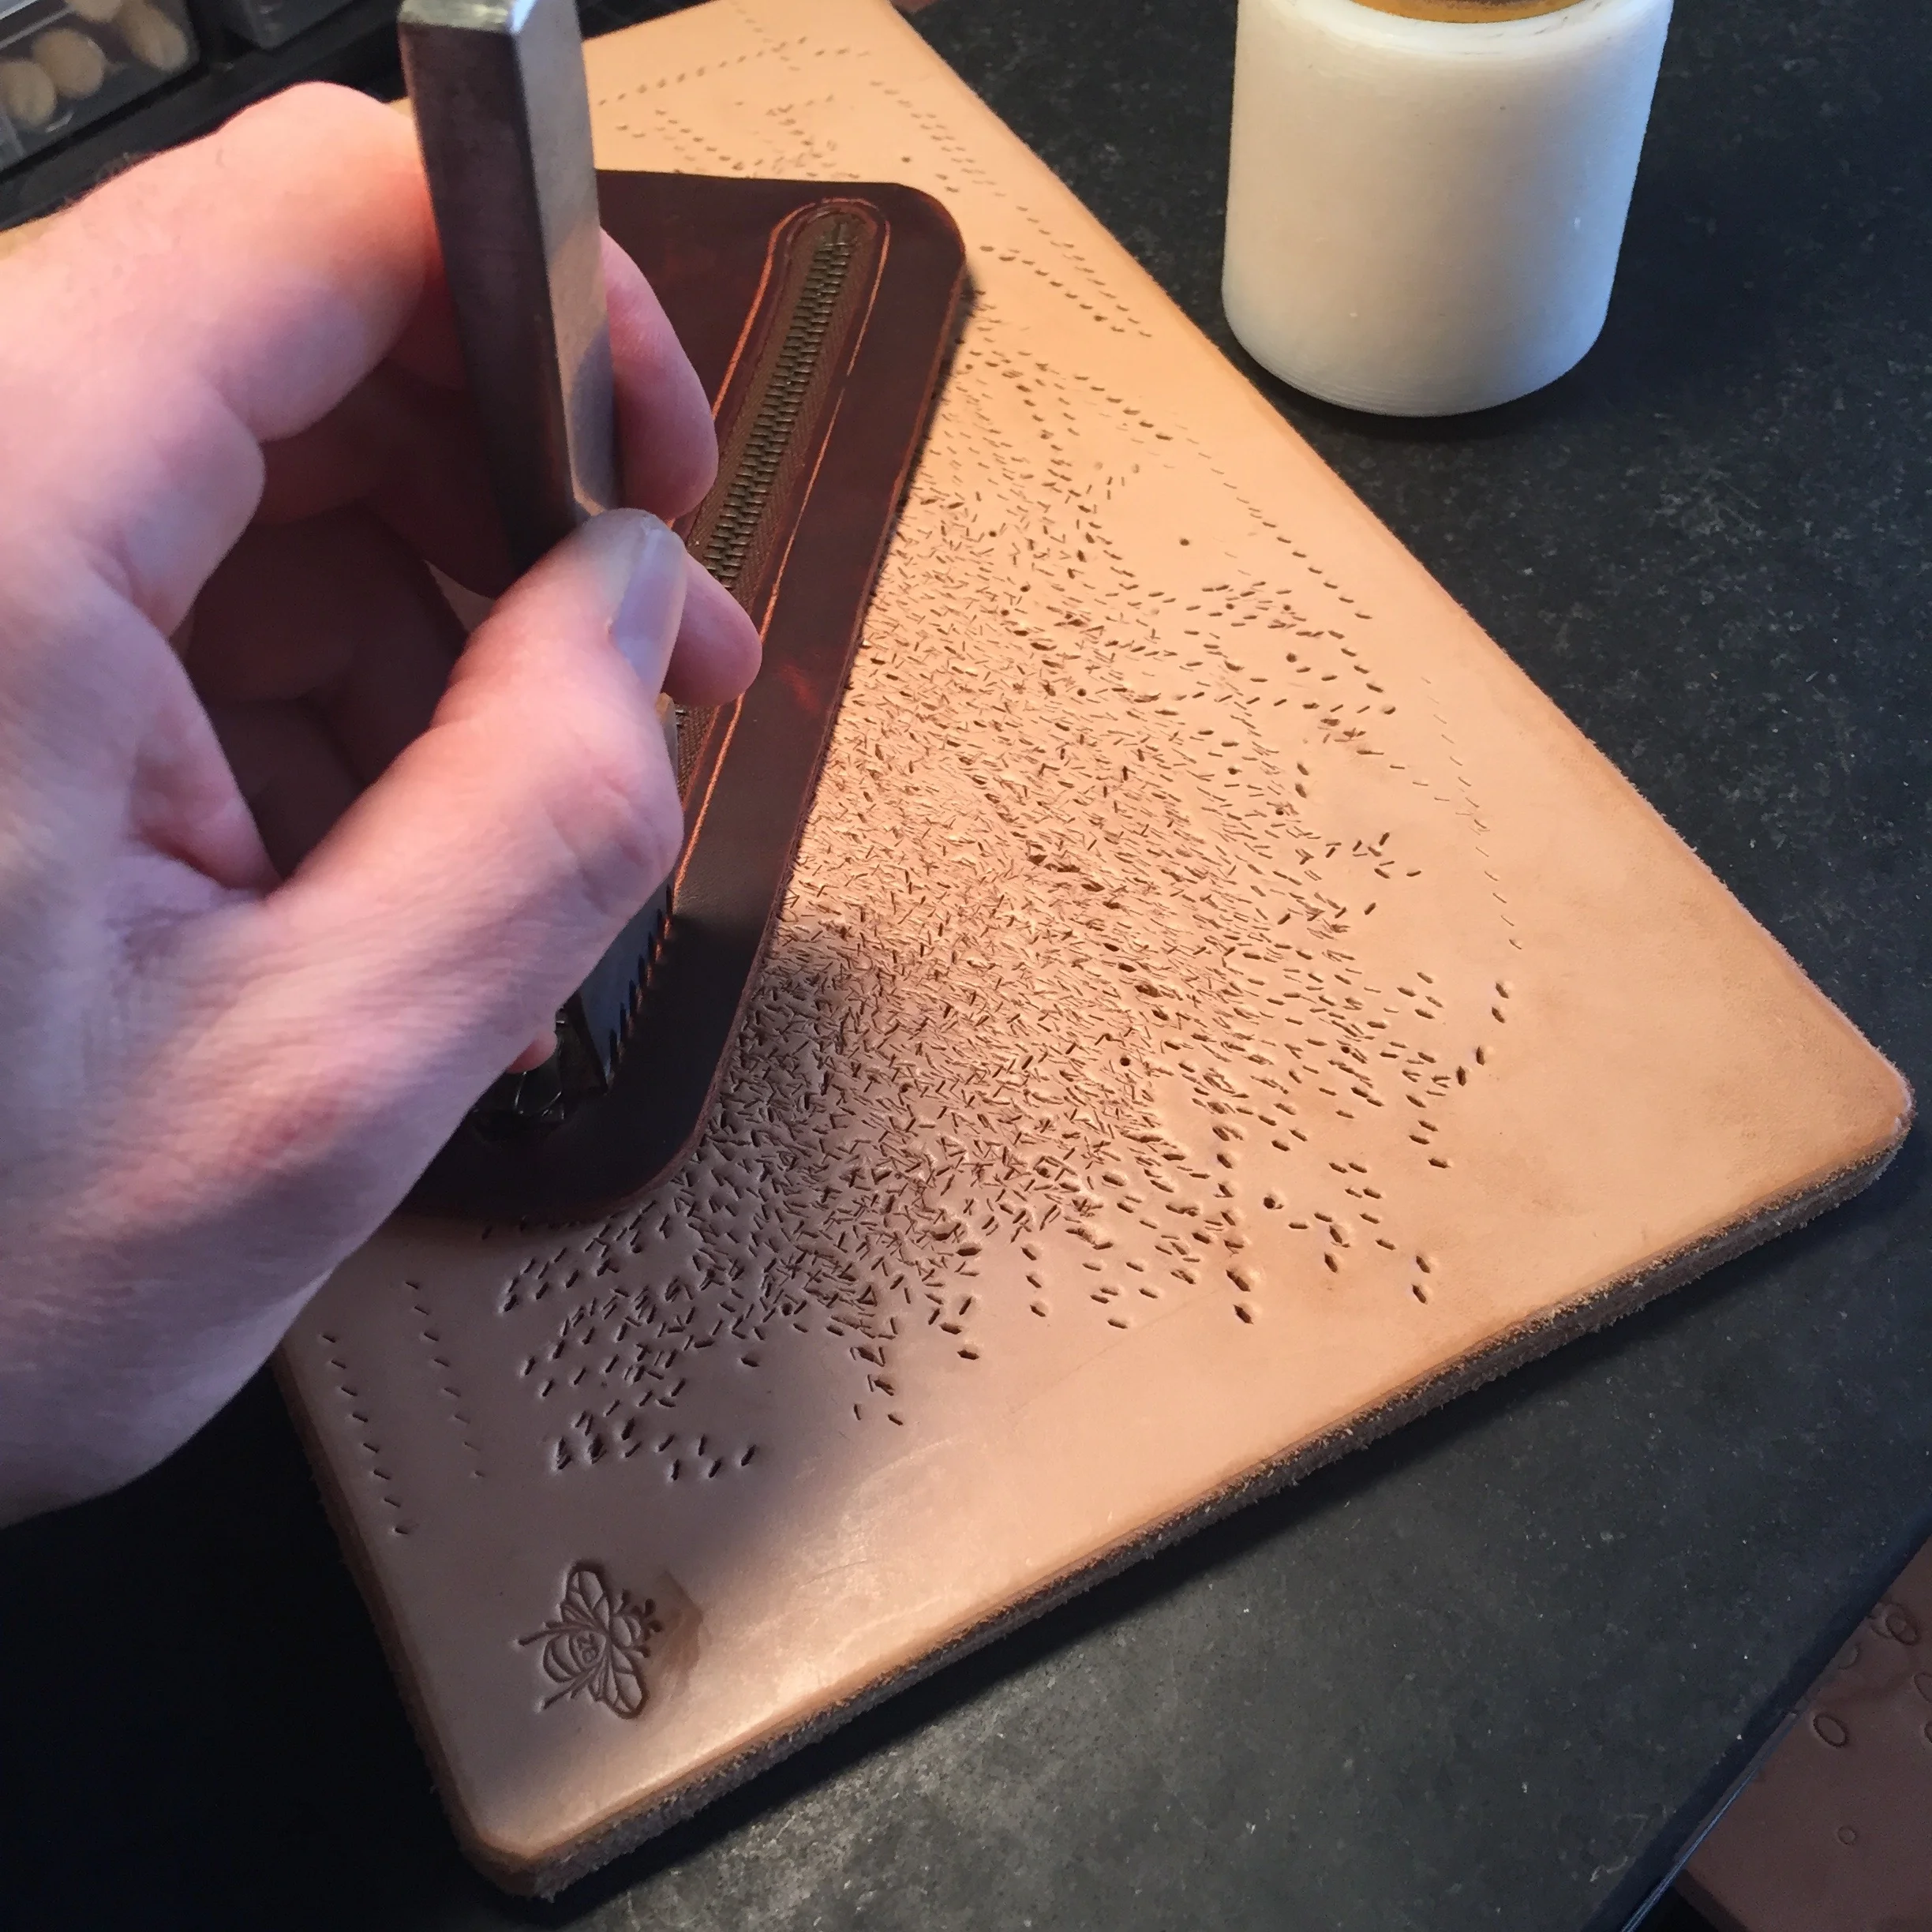
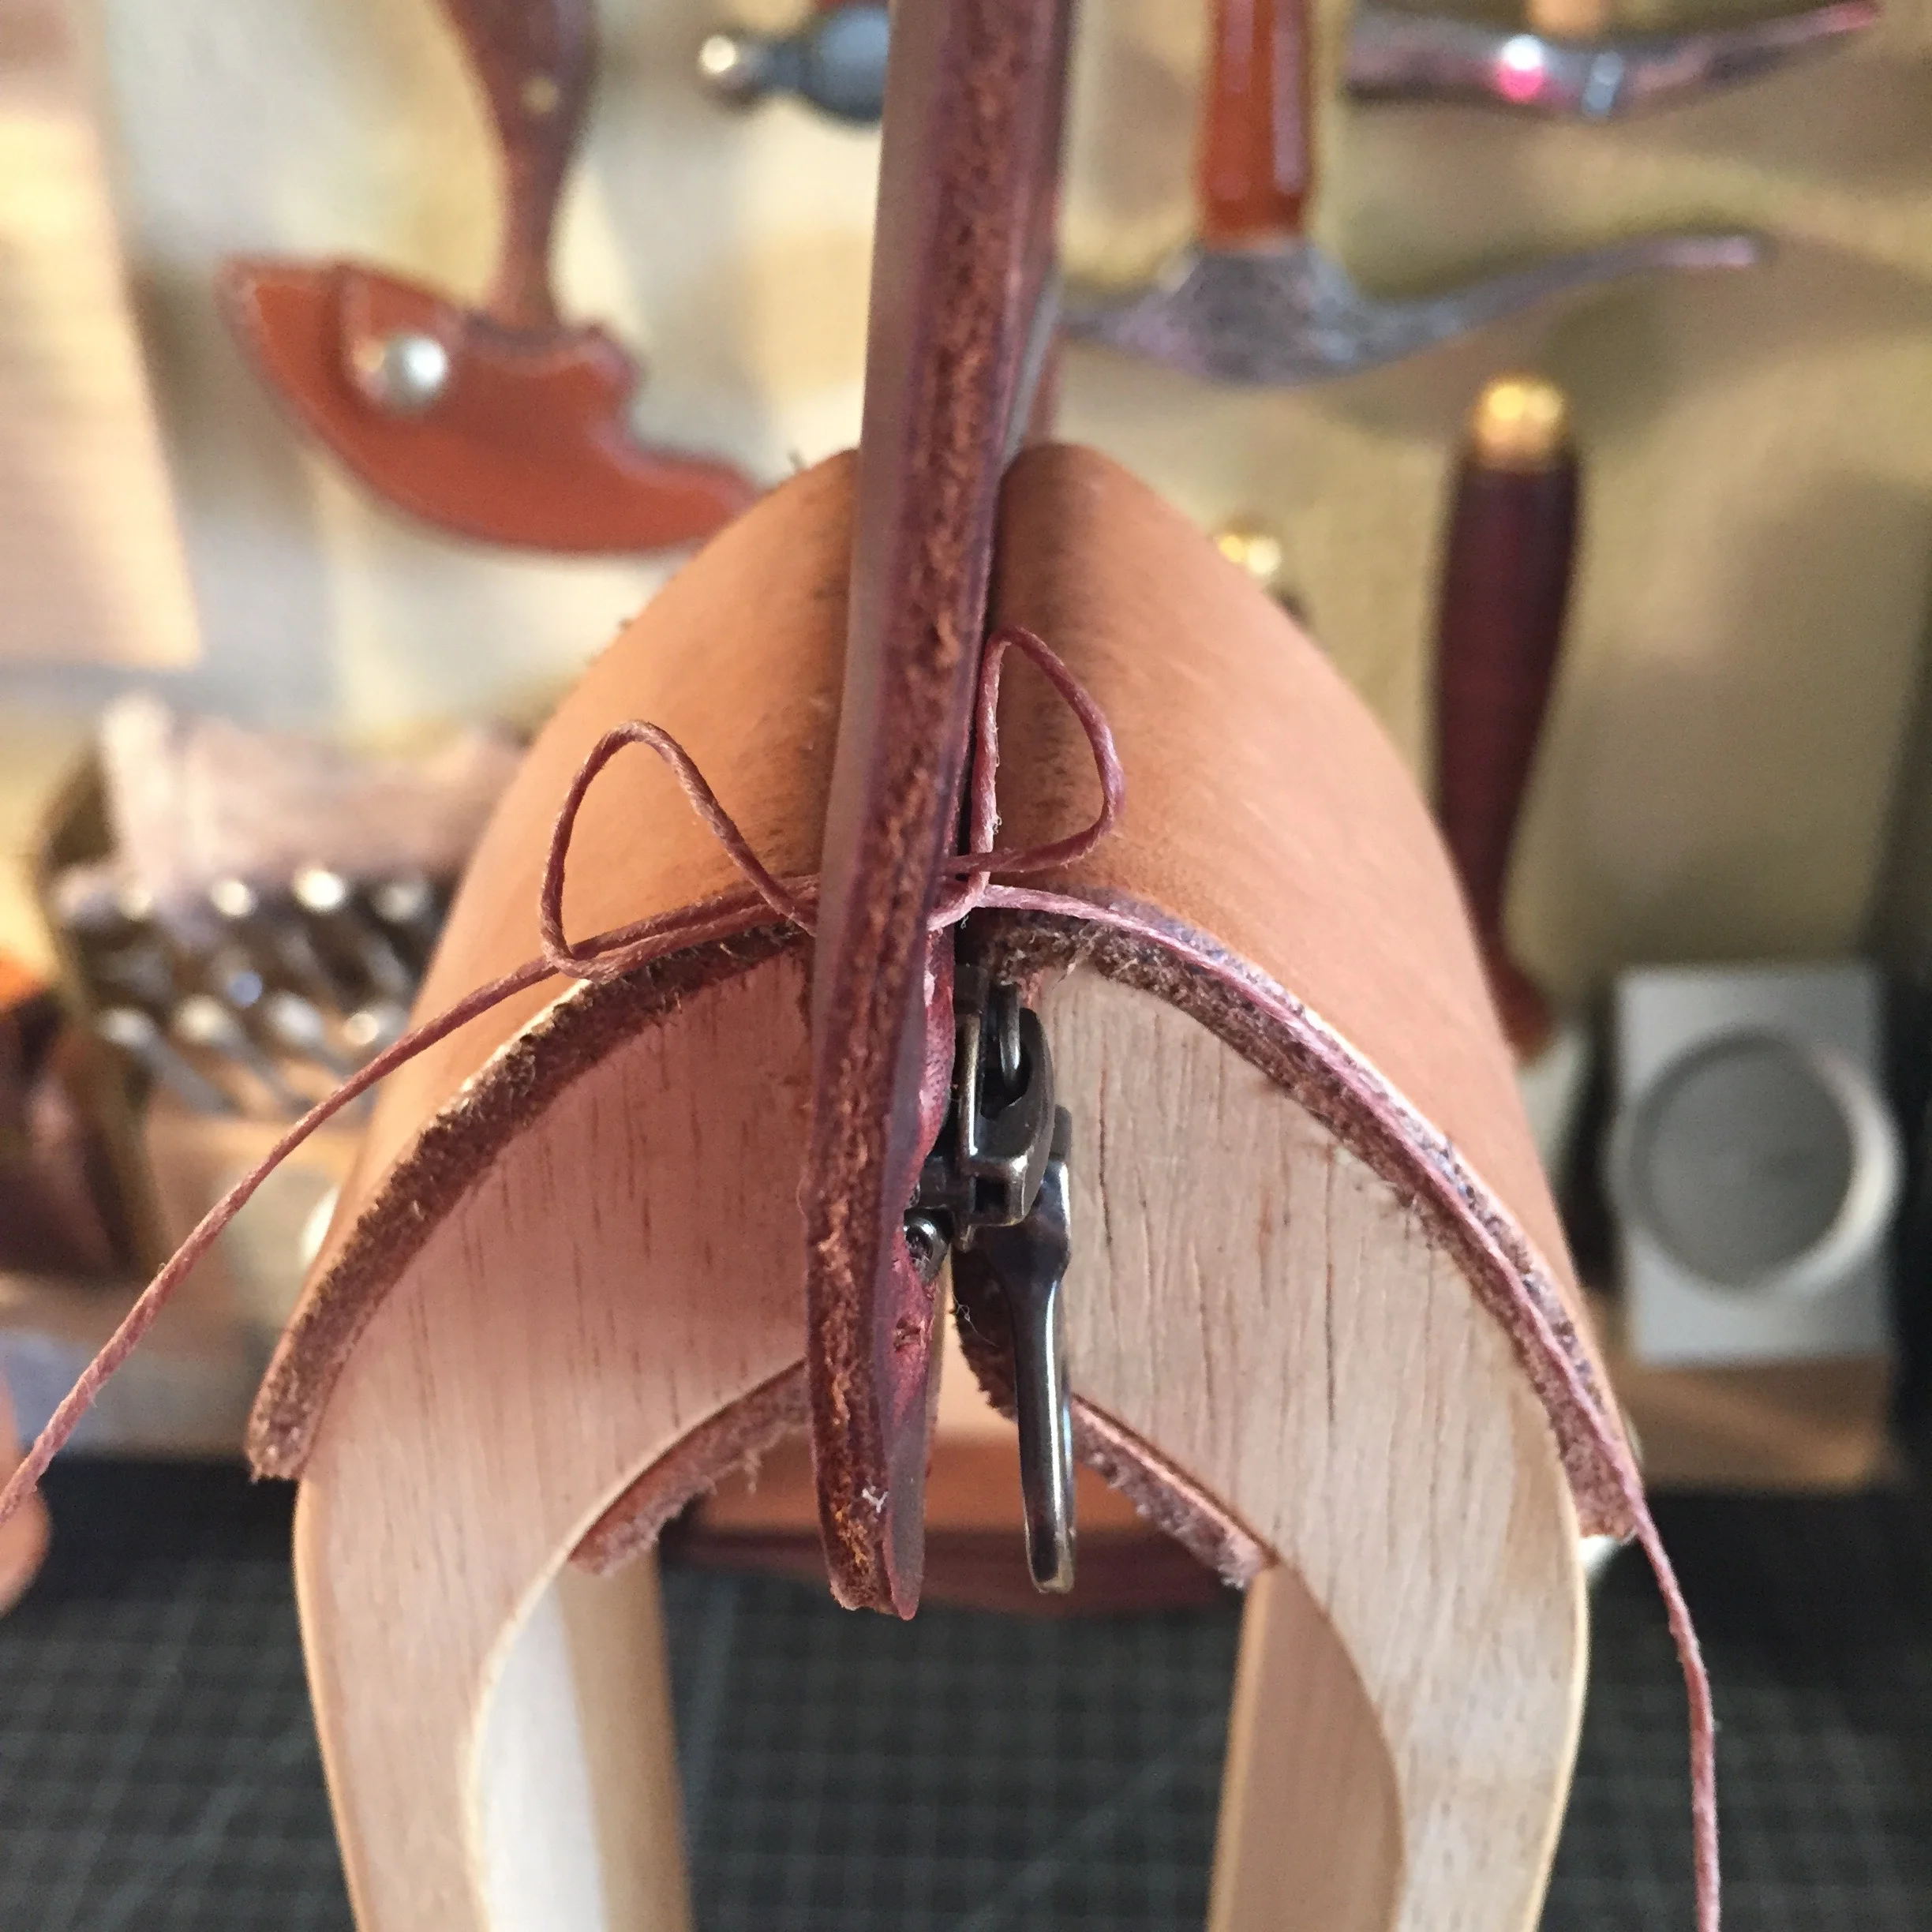
The next step is to make stitching holes all the way around. After that, the hand stitching begins.

Left needle goes in.
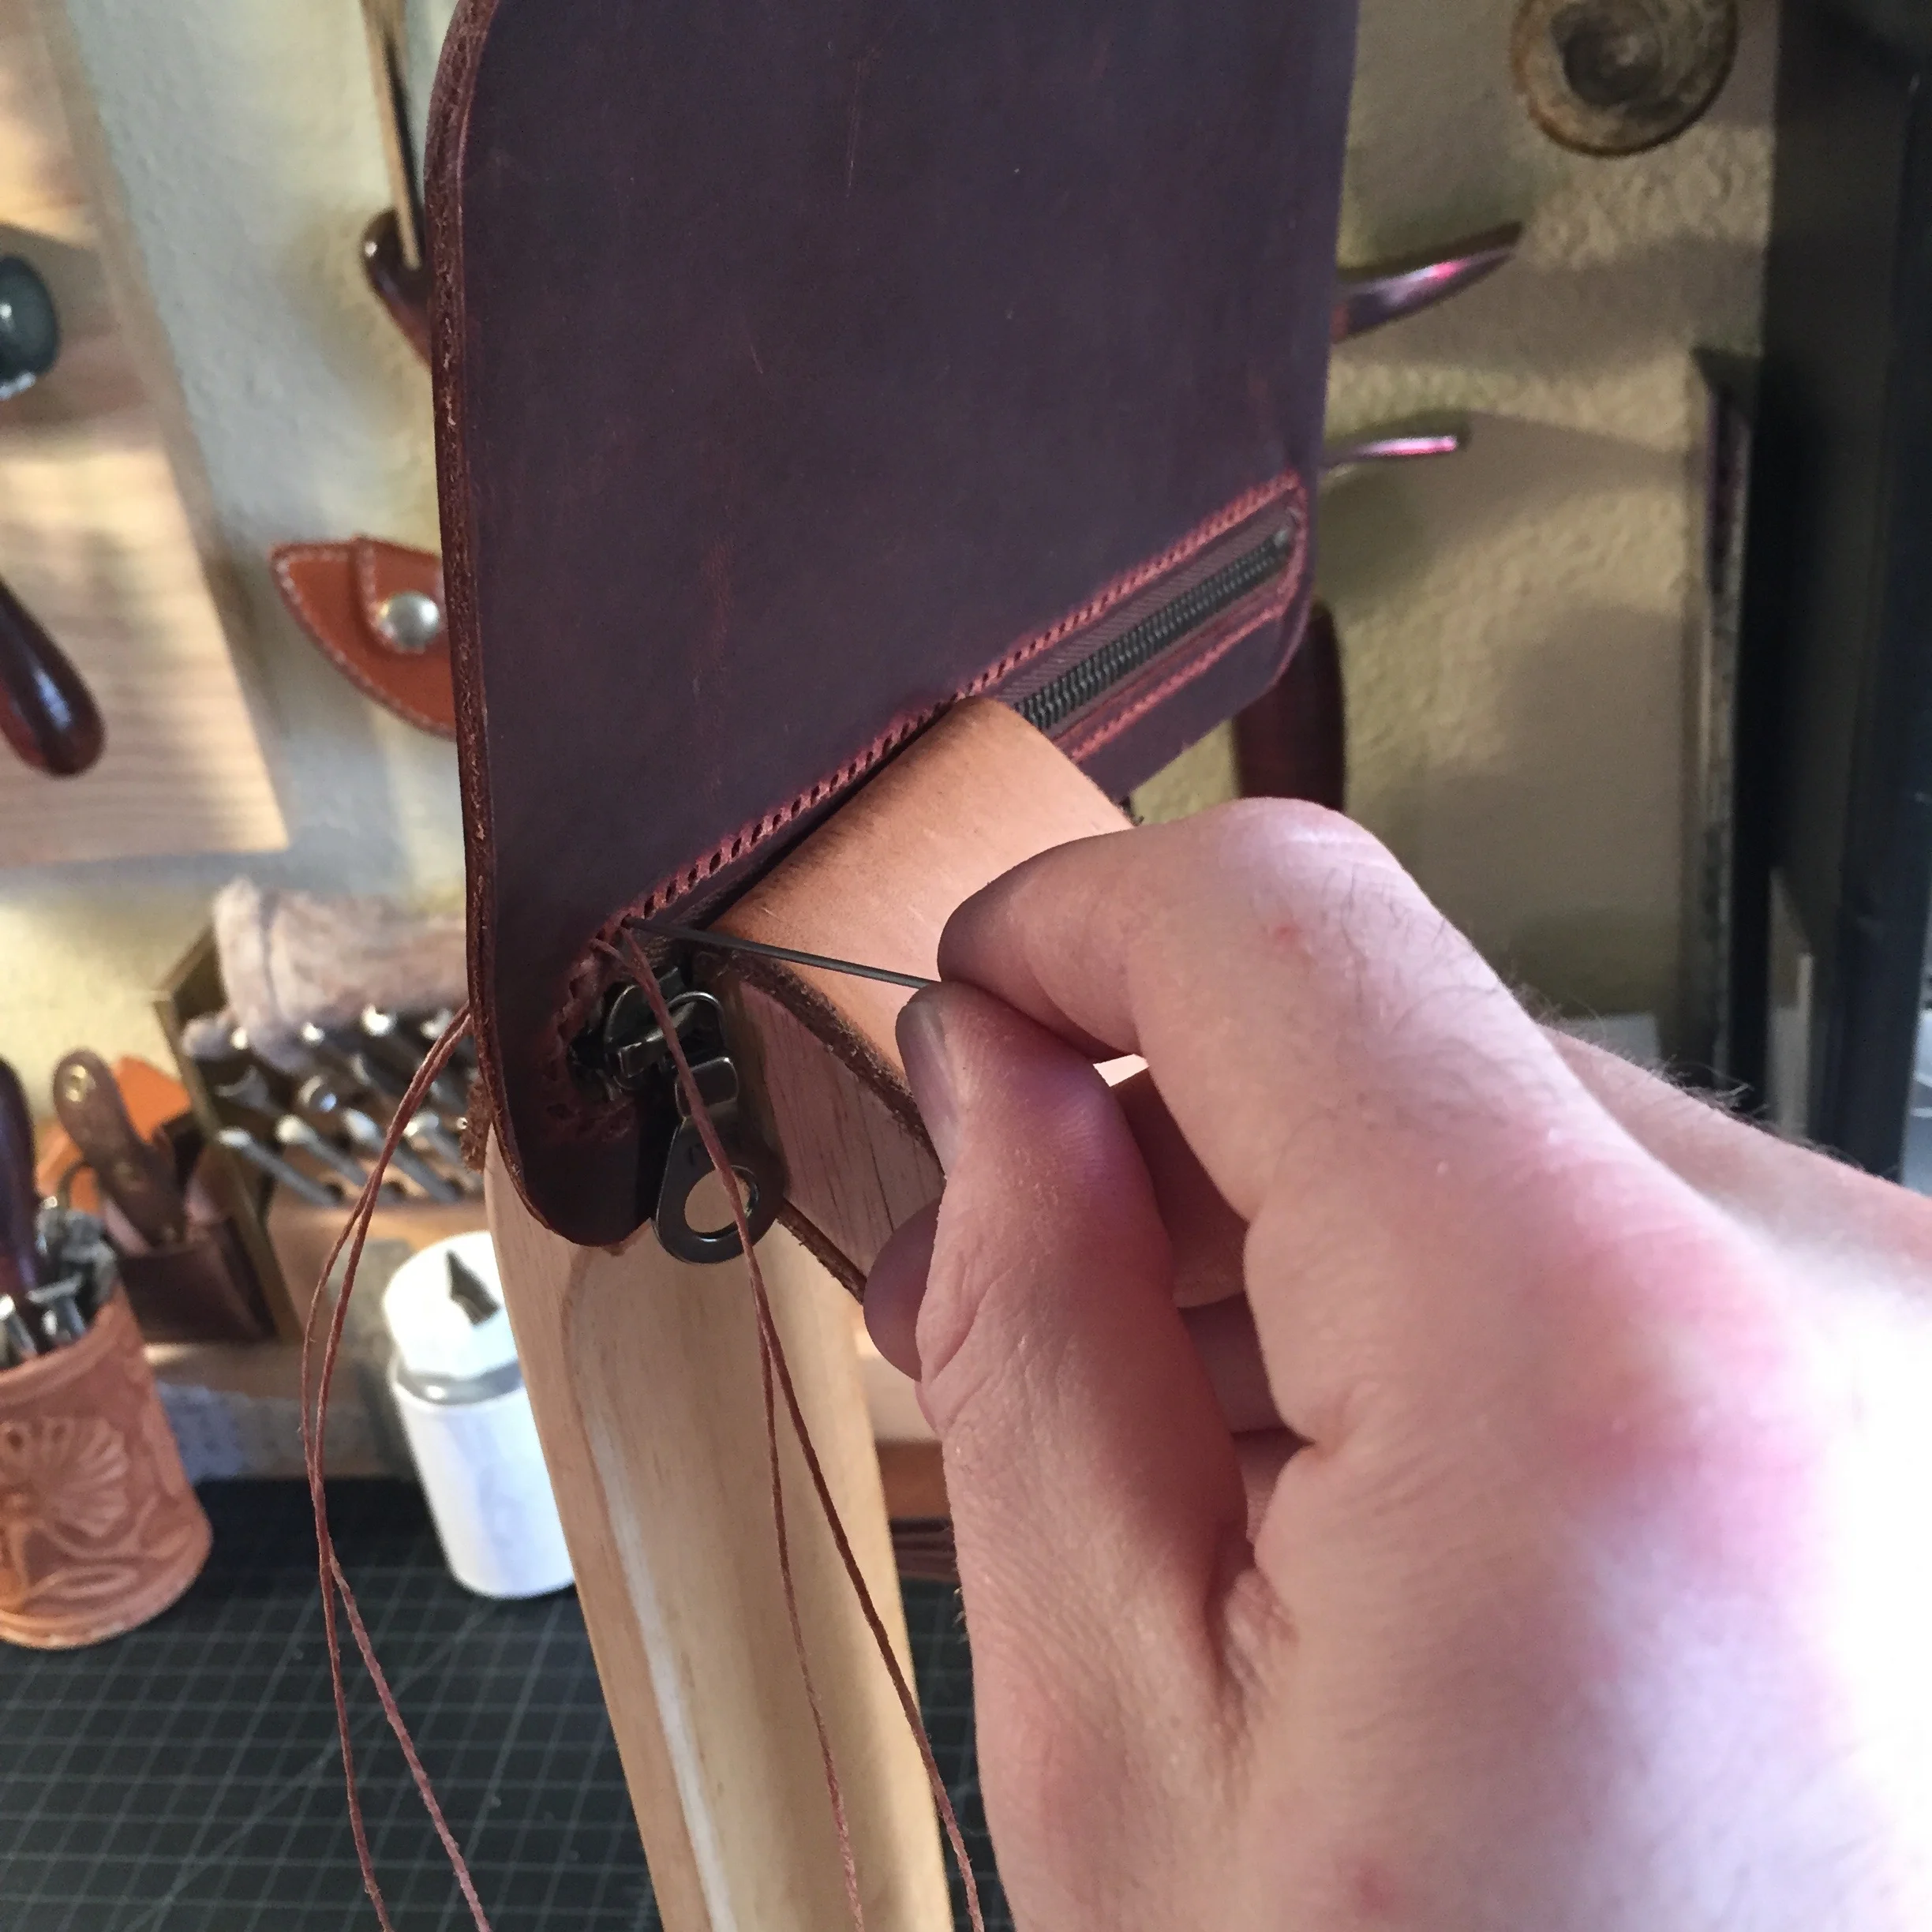
Right needle goes in.
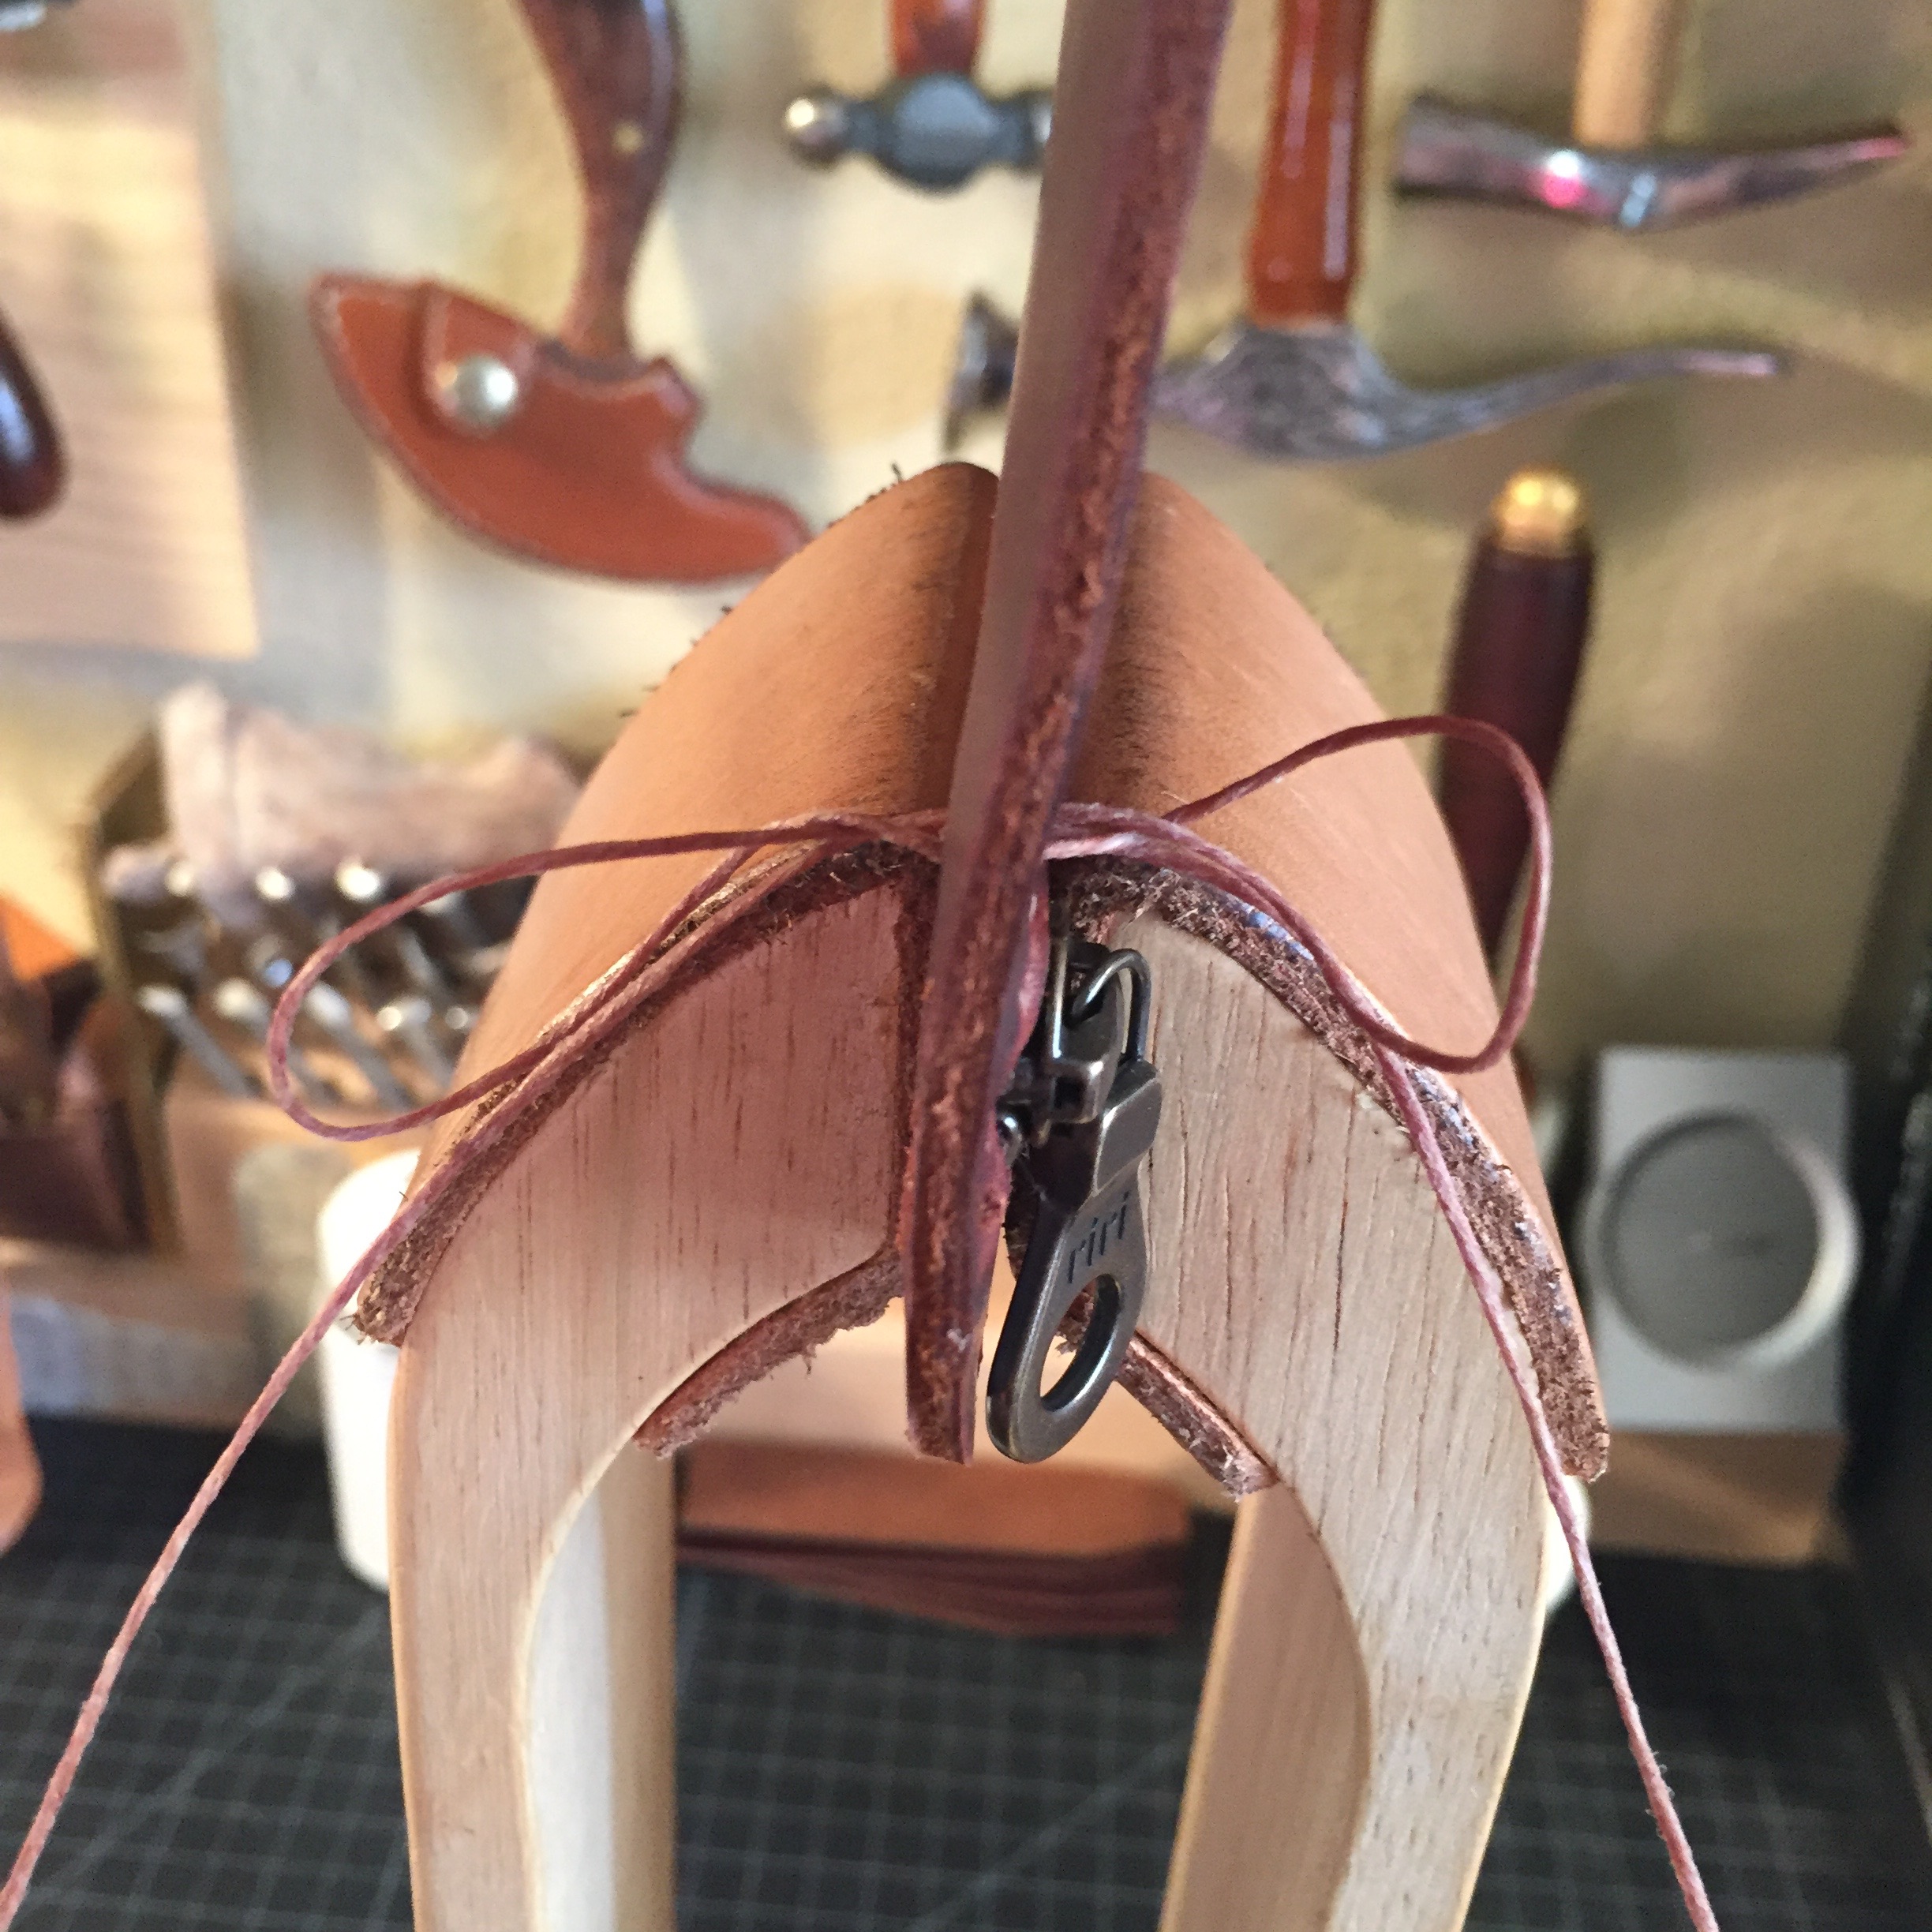
Pull the thread tight.
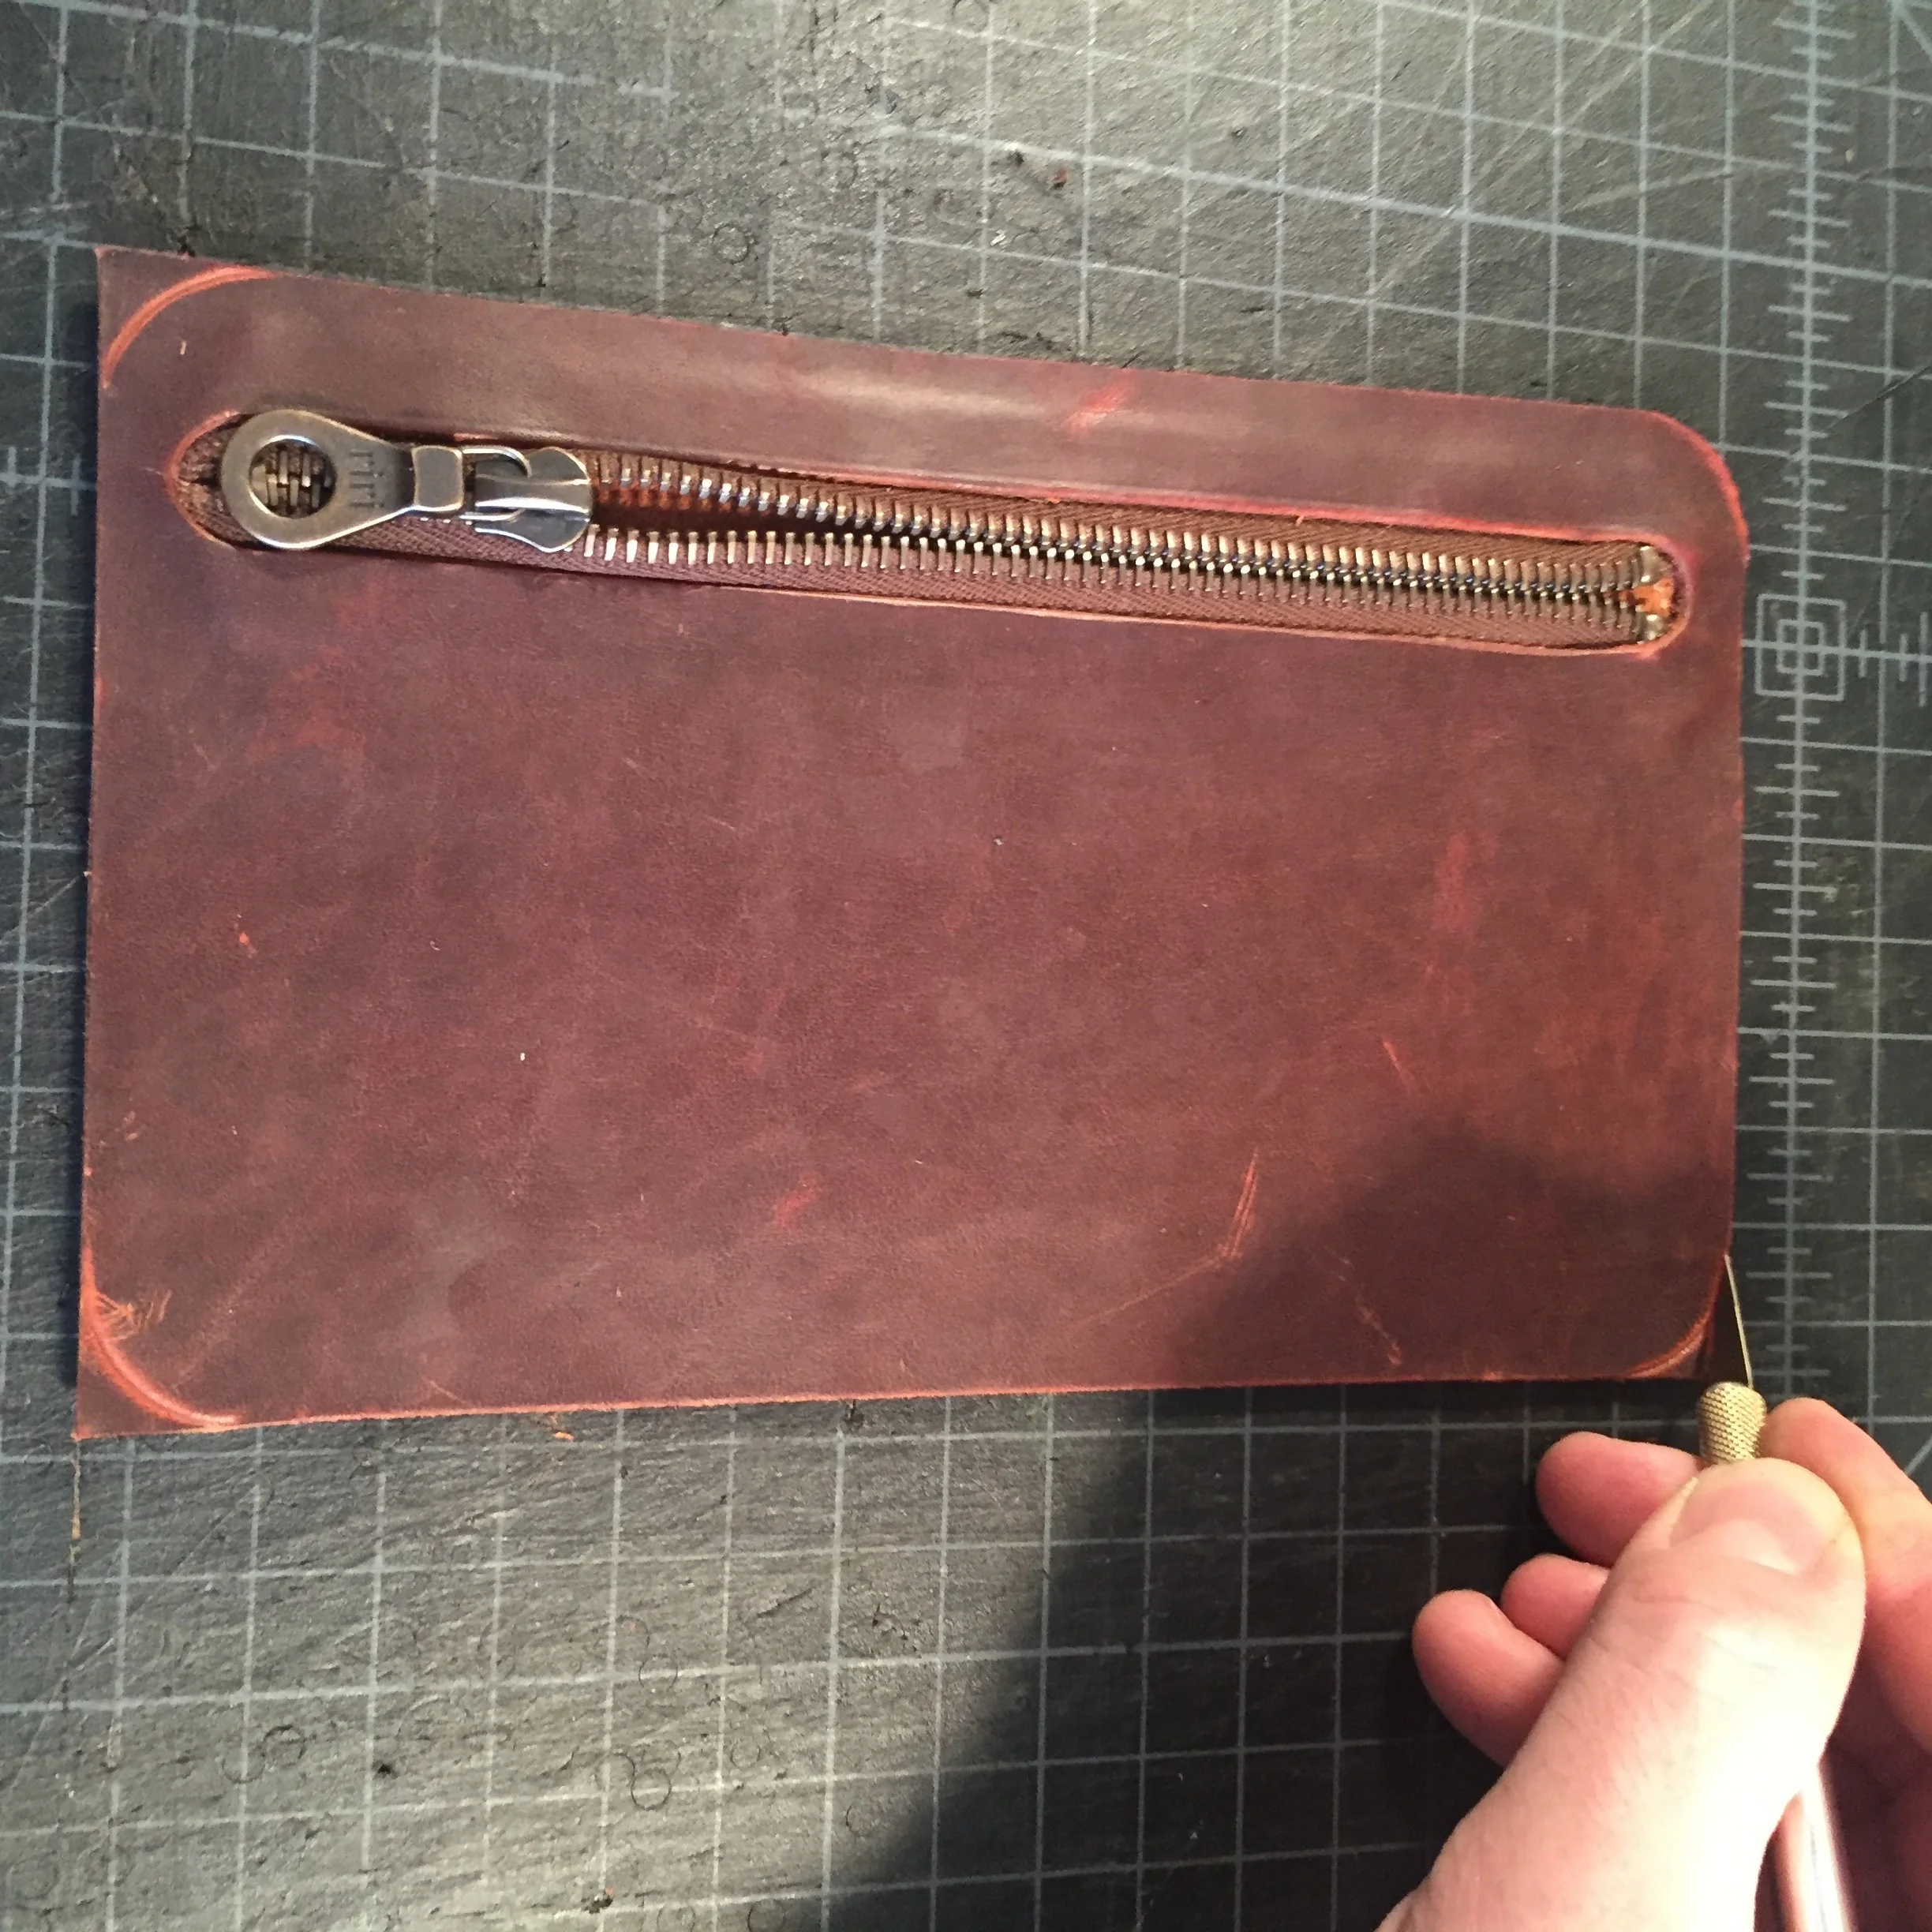
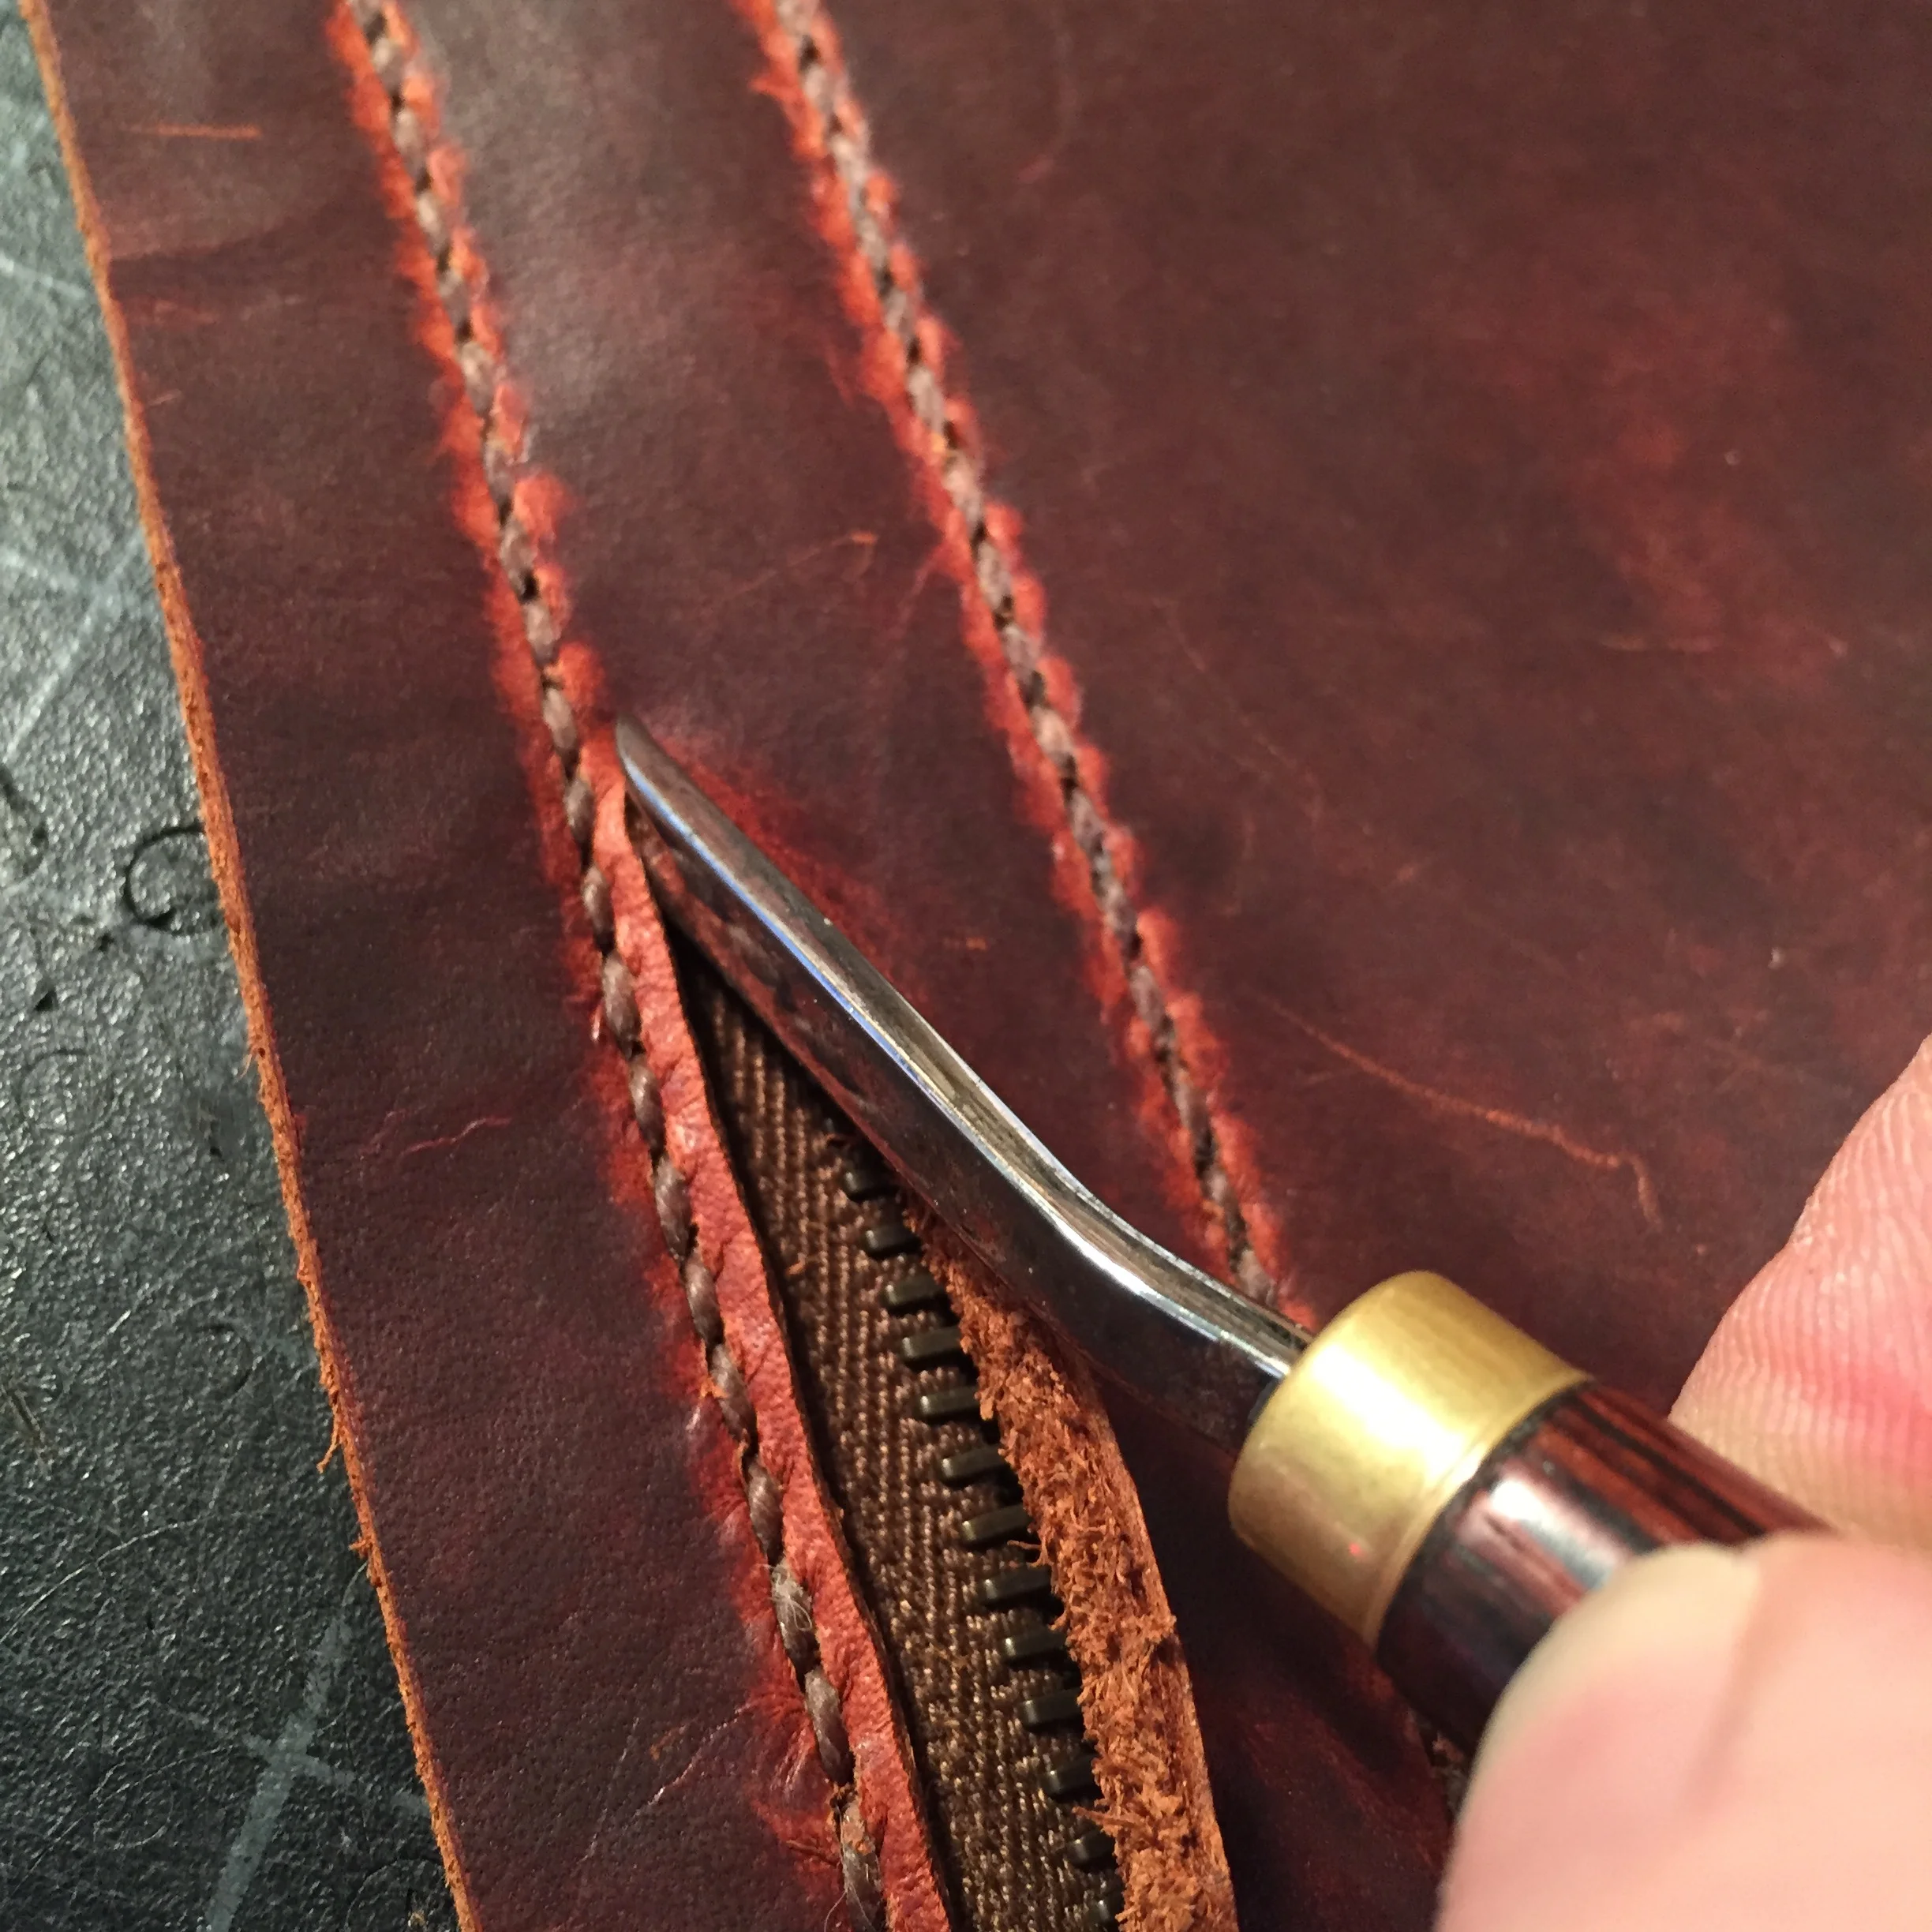
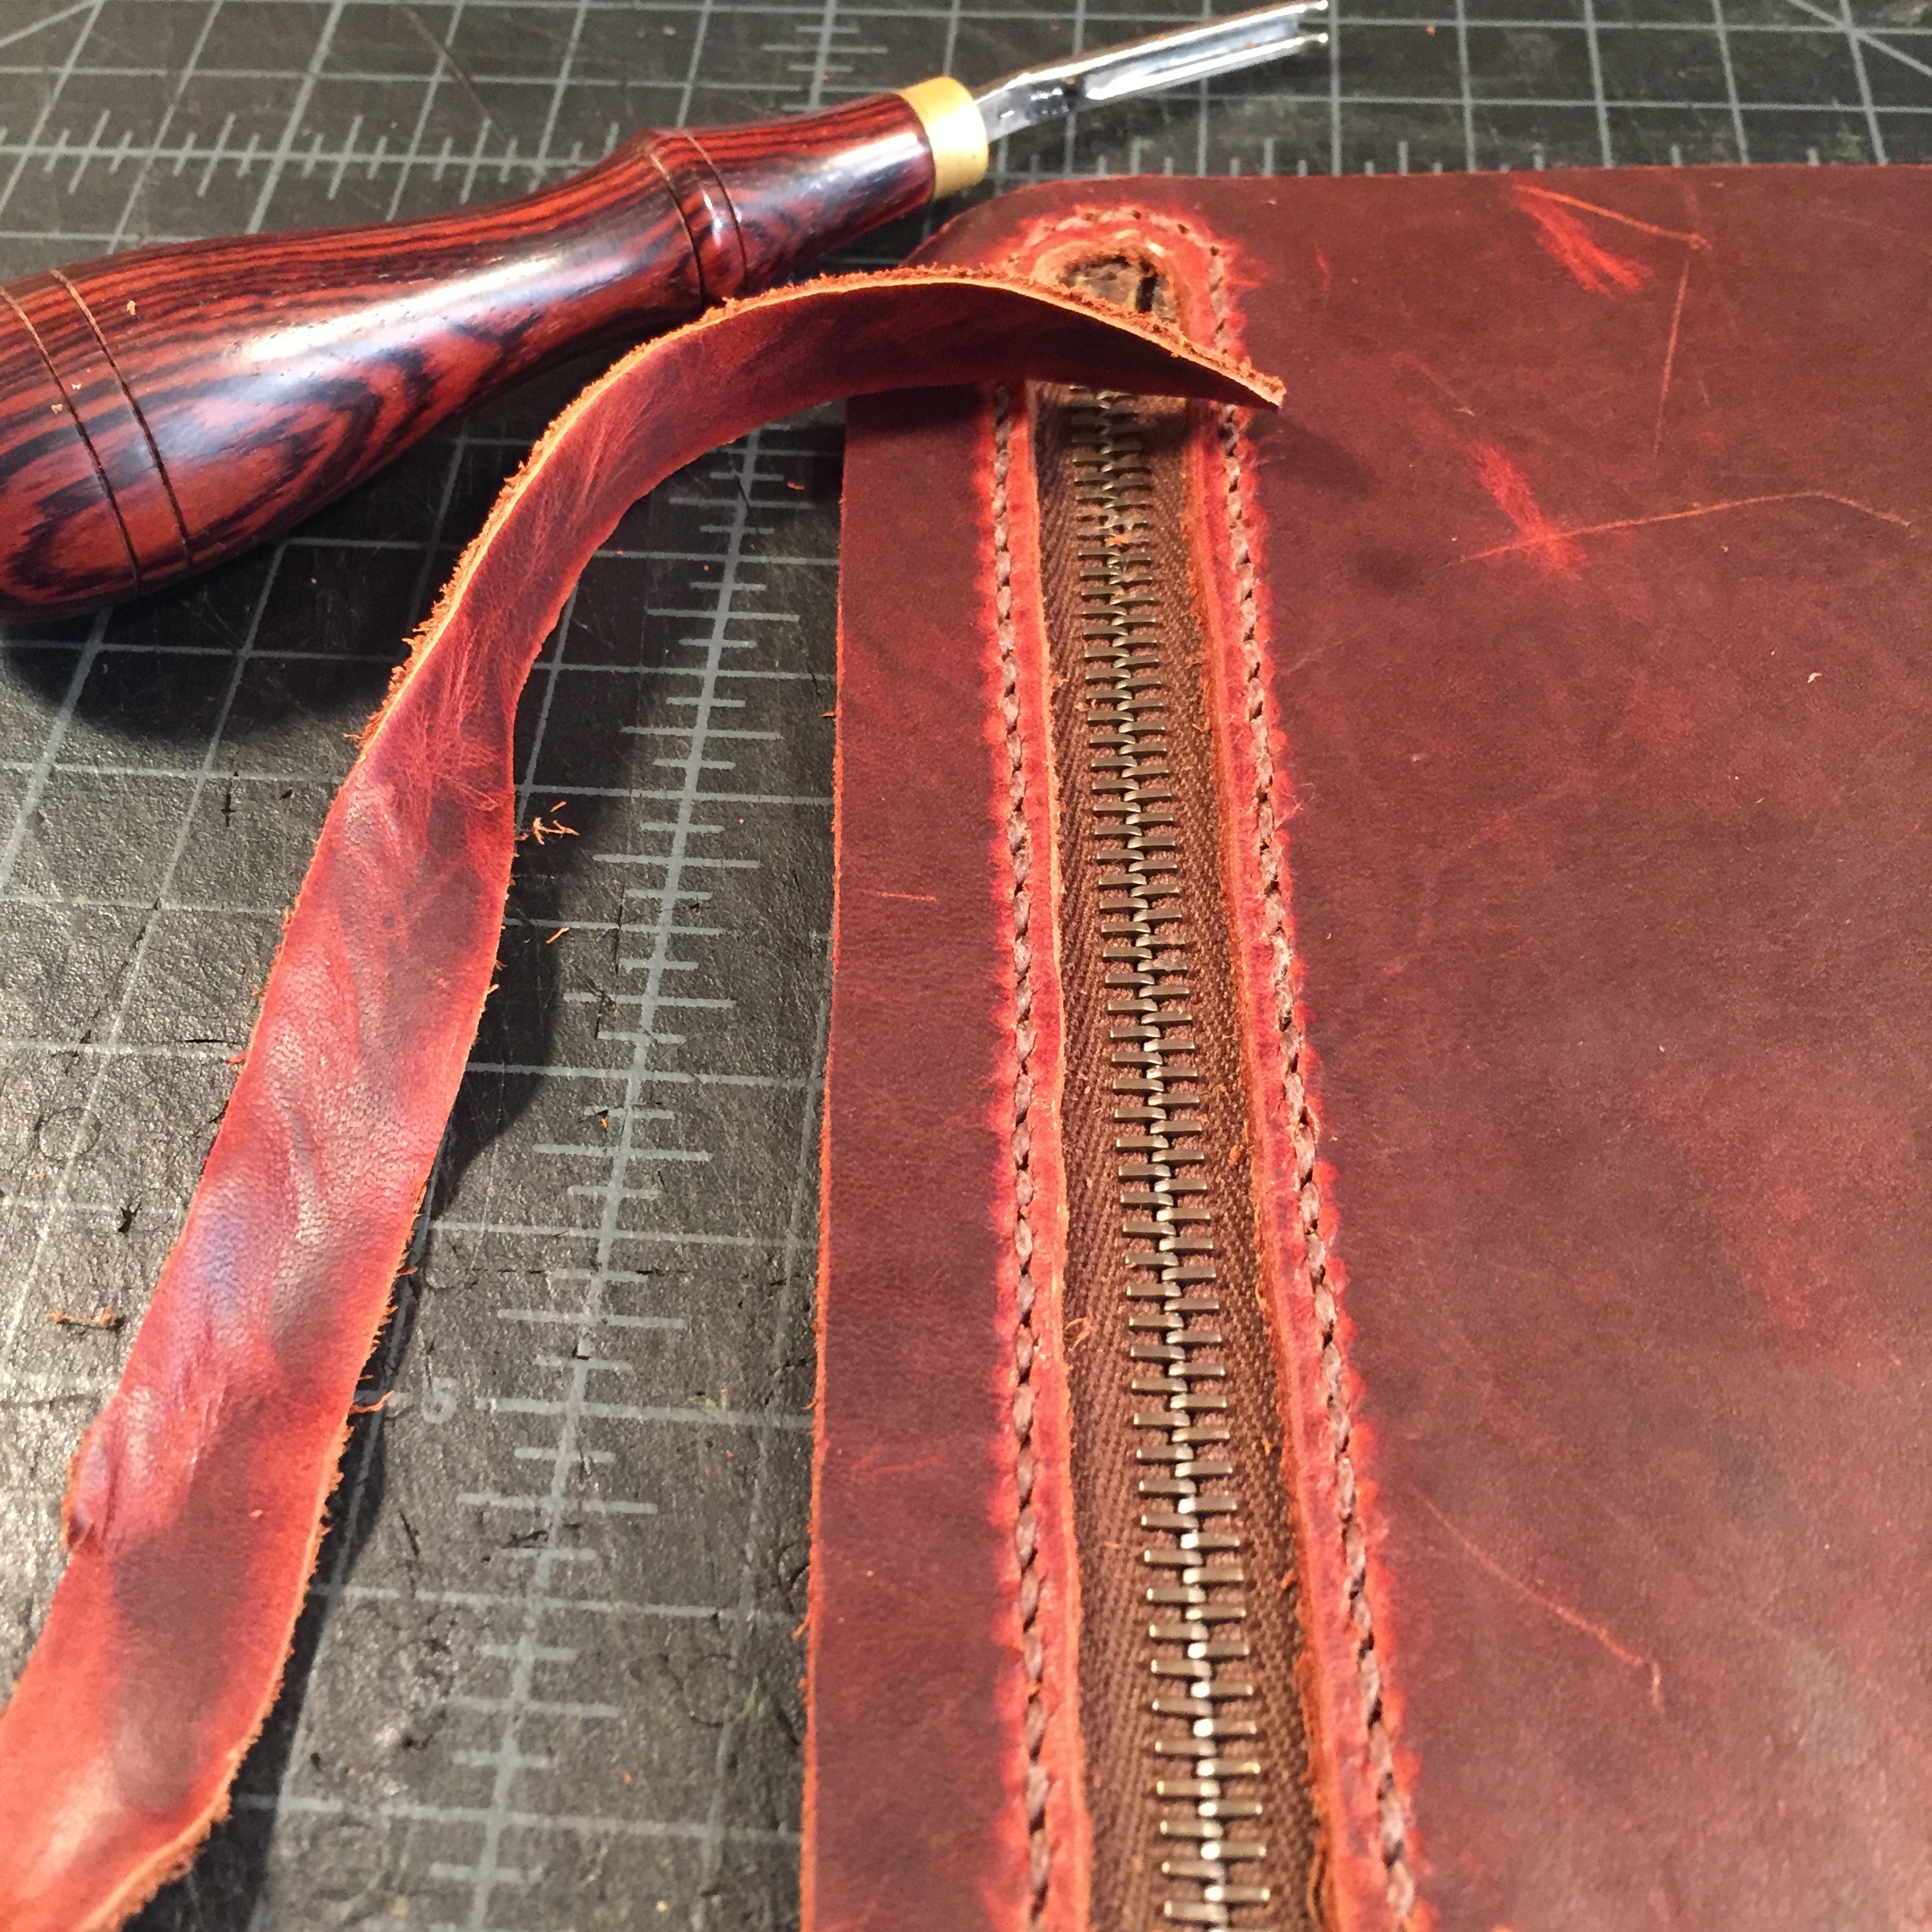
Once the entire zipper has been stitched, the whole piece is removed from the stitching pony for the best part. Cutting away the lining! This part is a little scary because one false move, and hours of work will be ruined, but if care and attention to detail are kept in mind, this can be a fun and rewarding step.
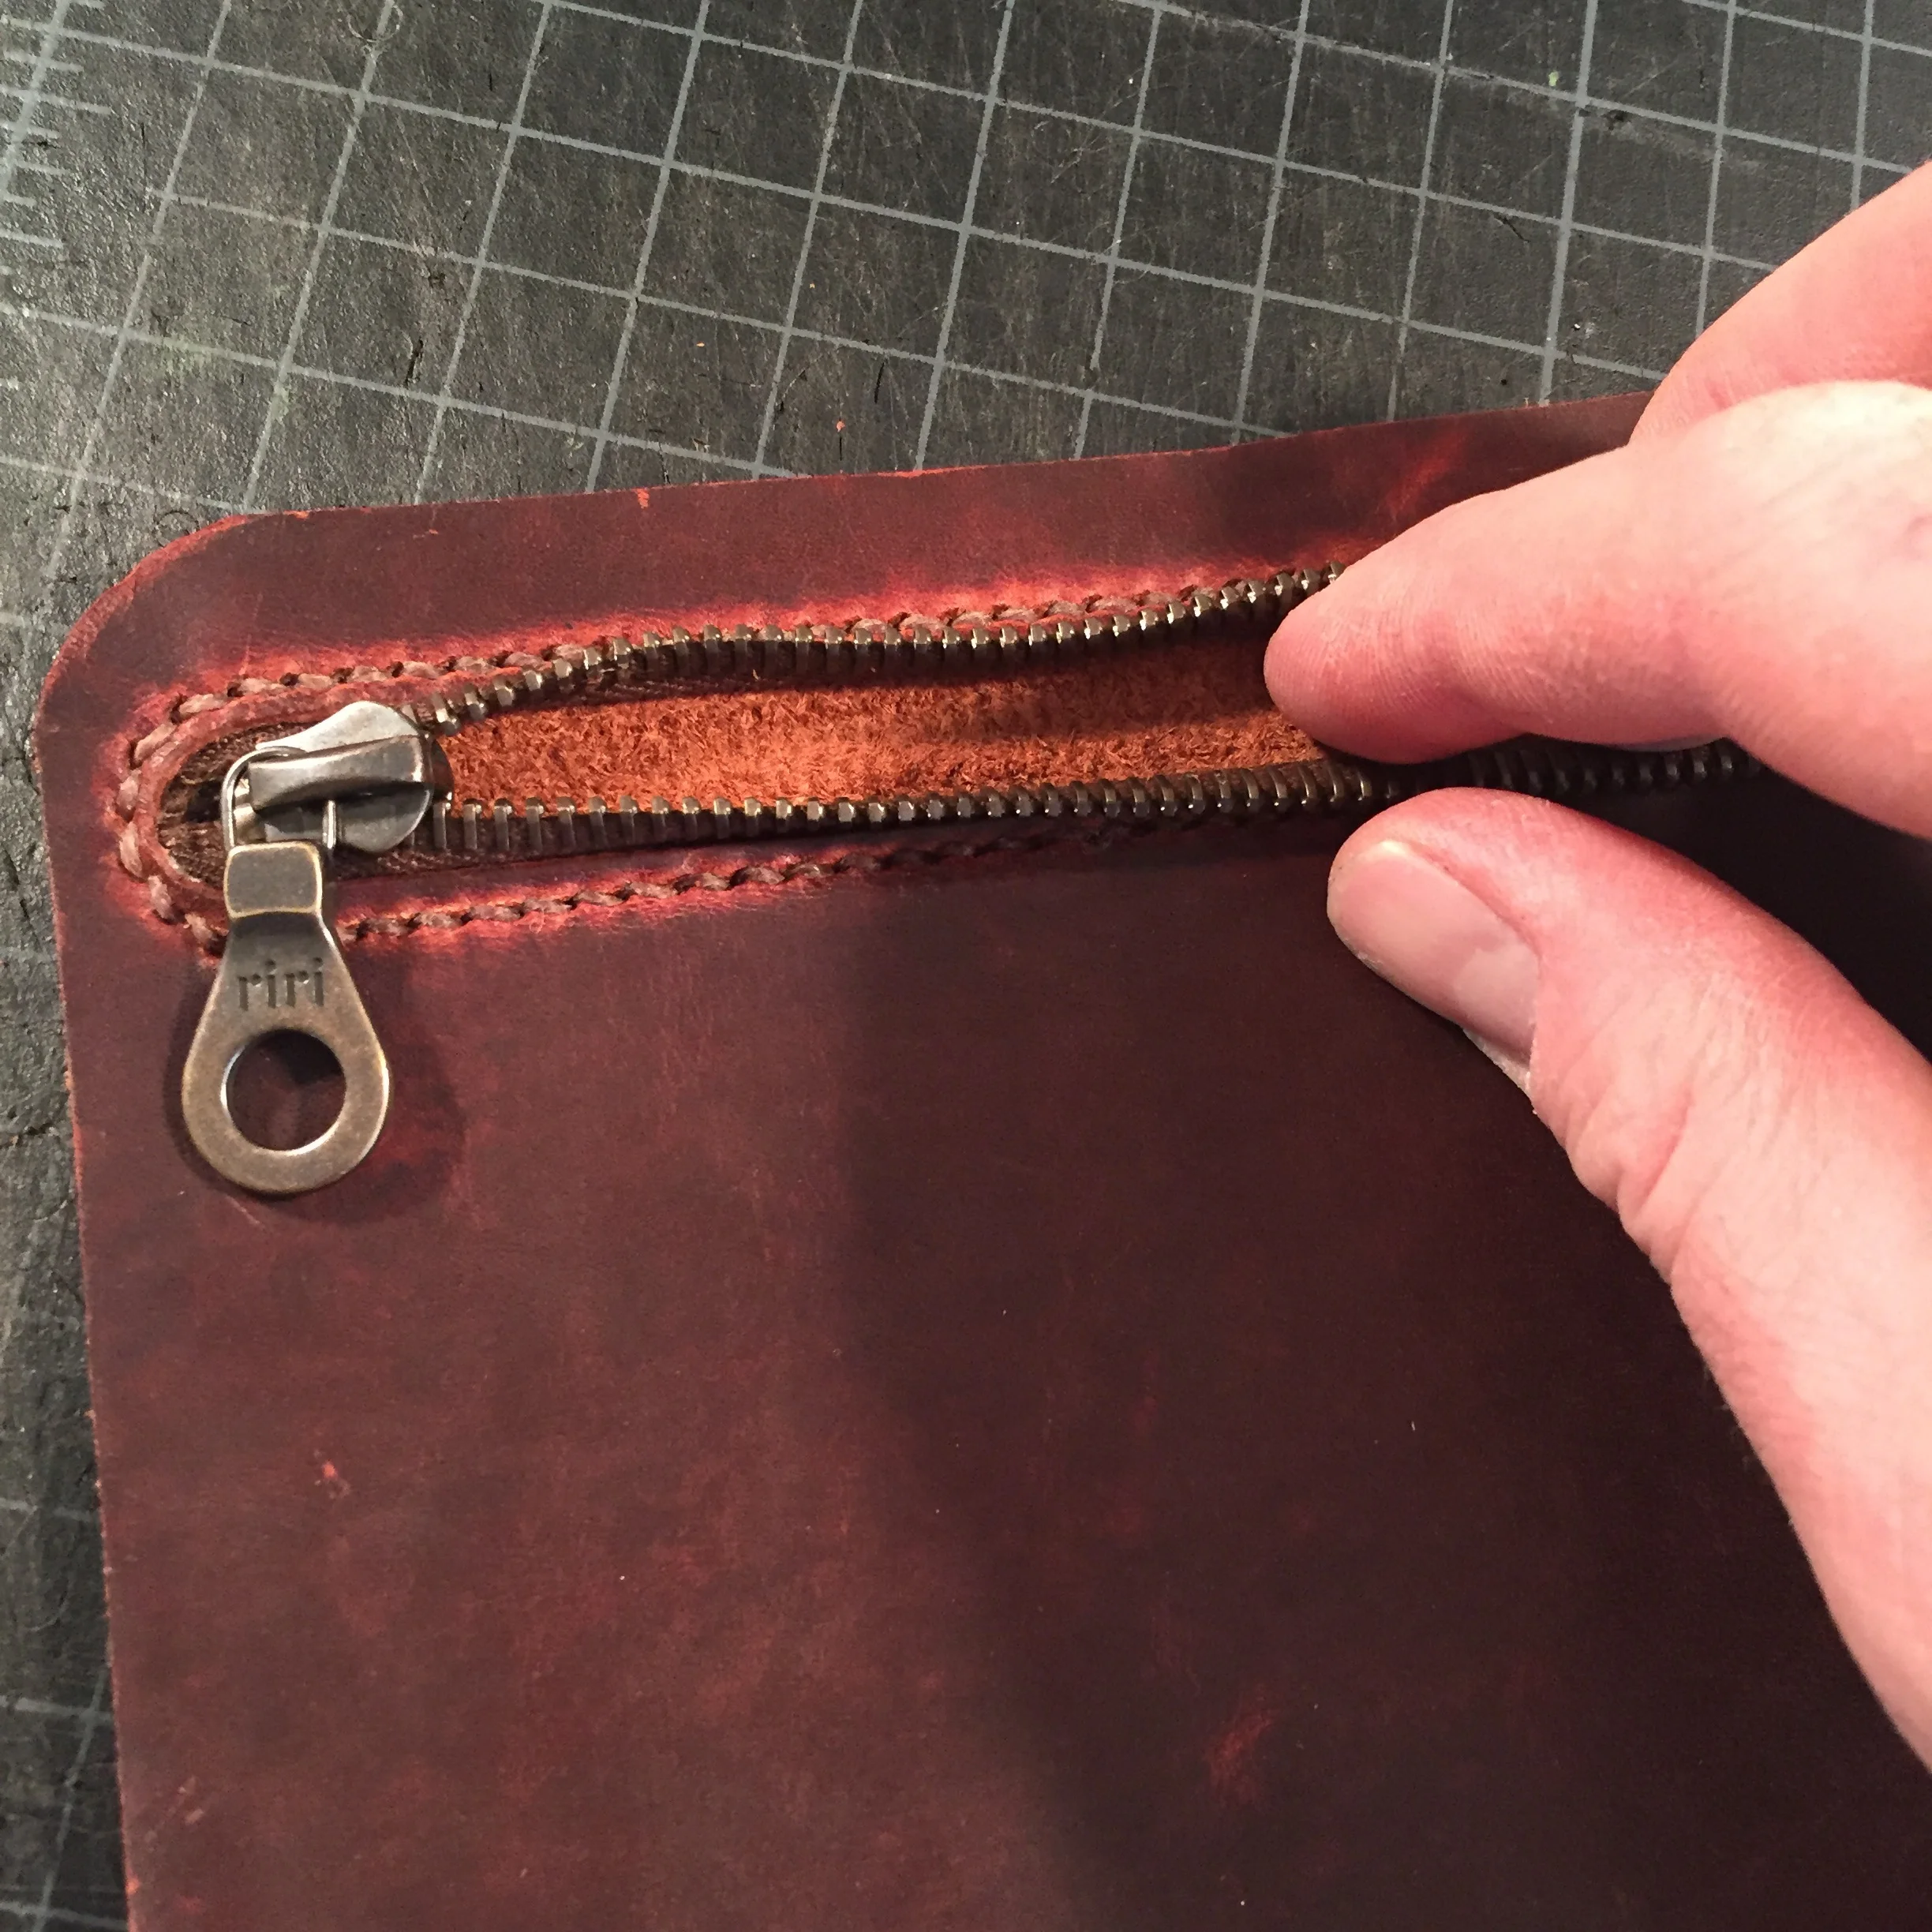
I make a little cut from the zipper side so I know where to start my cut on the other (lining) side.
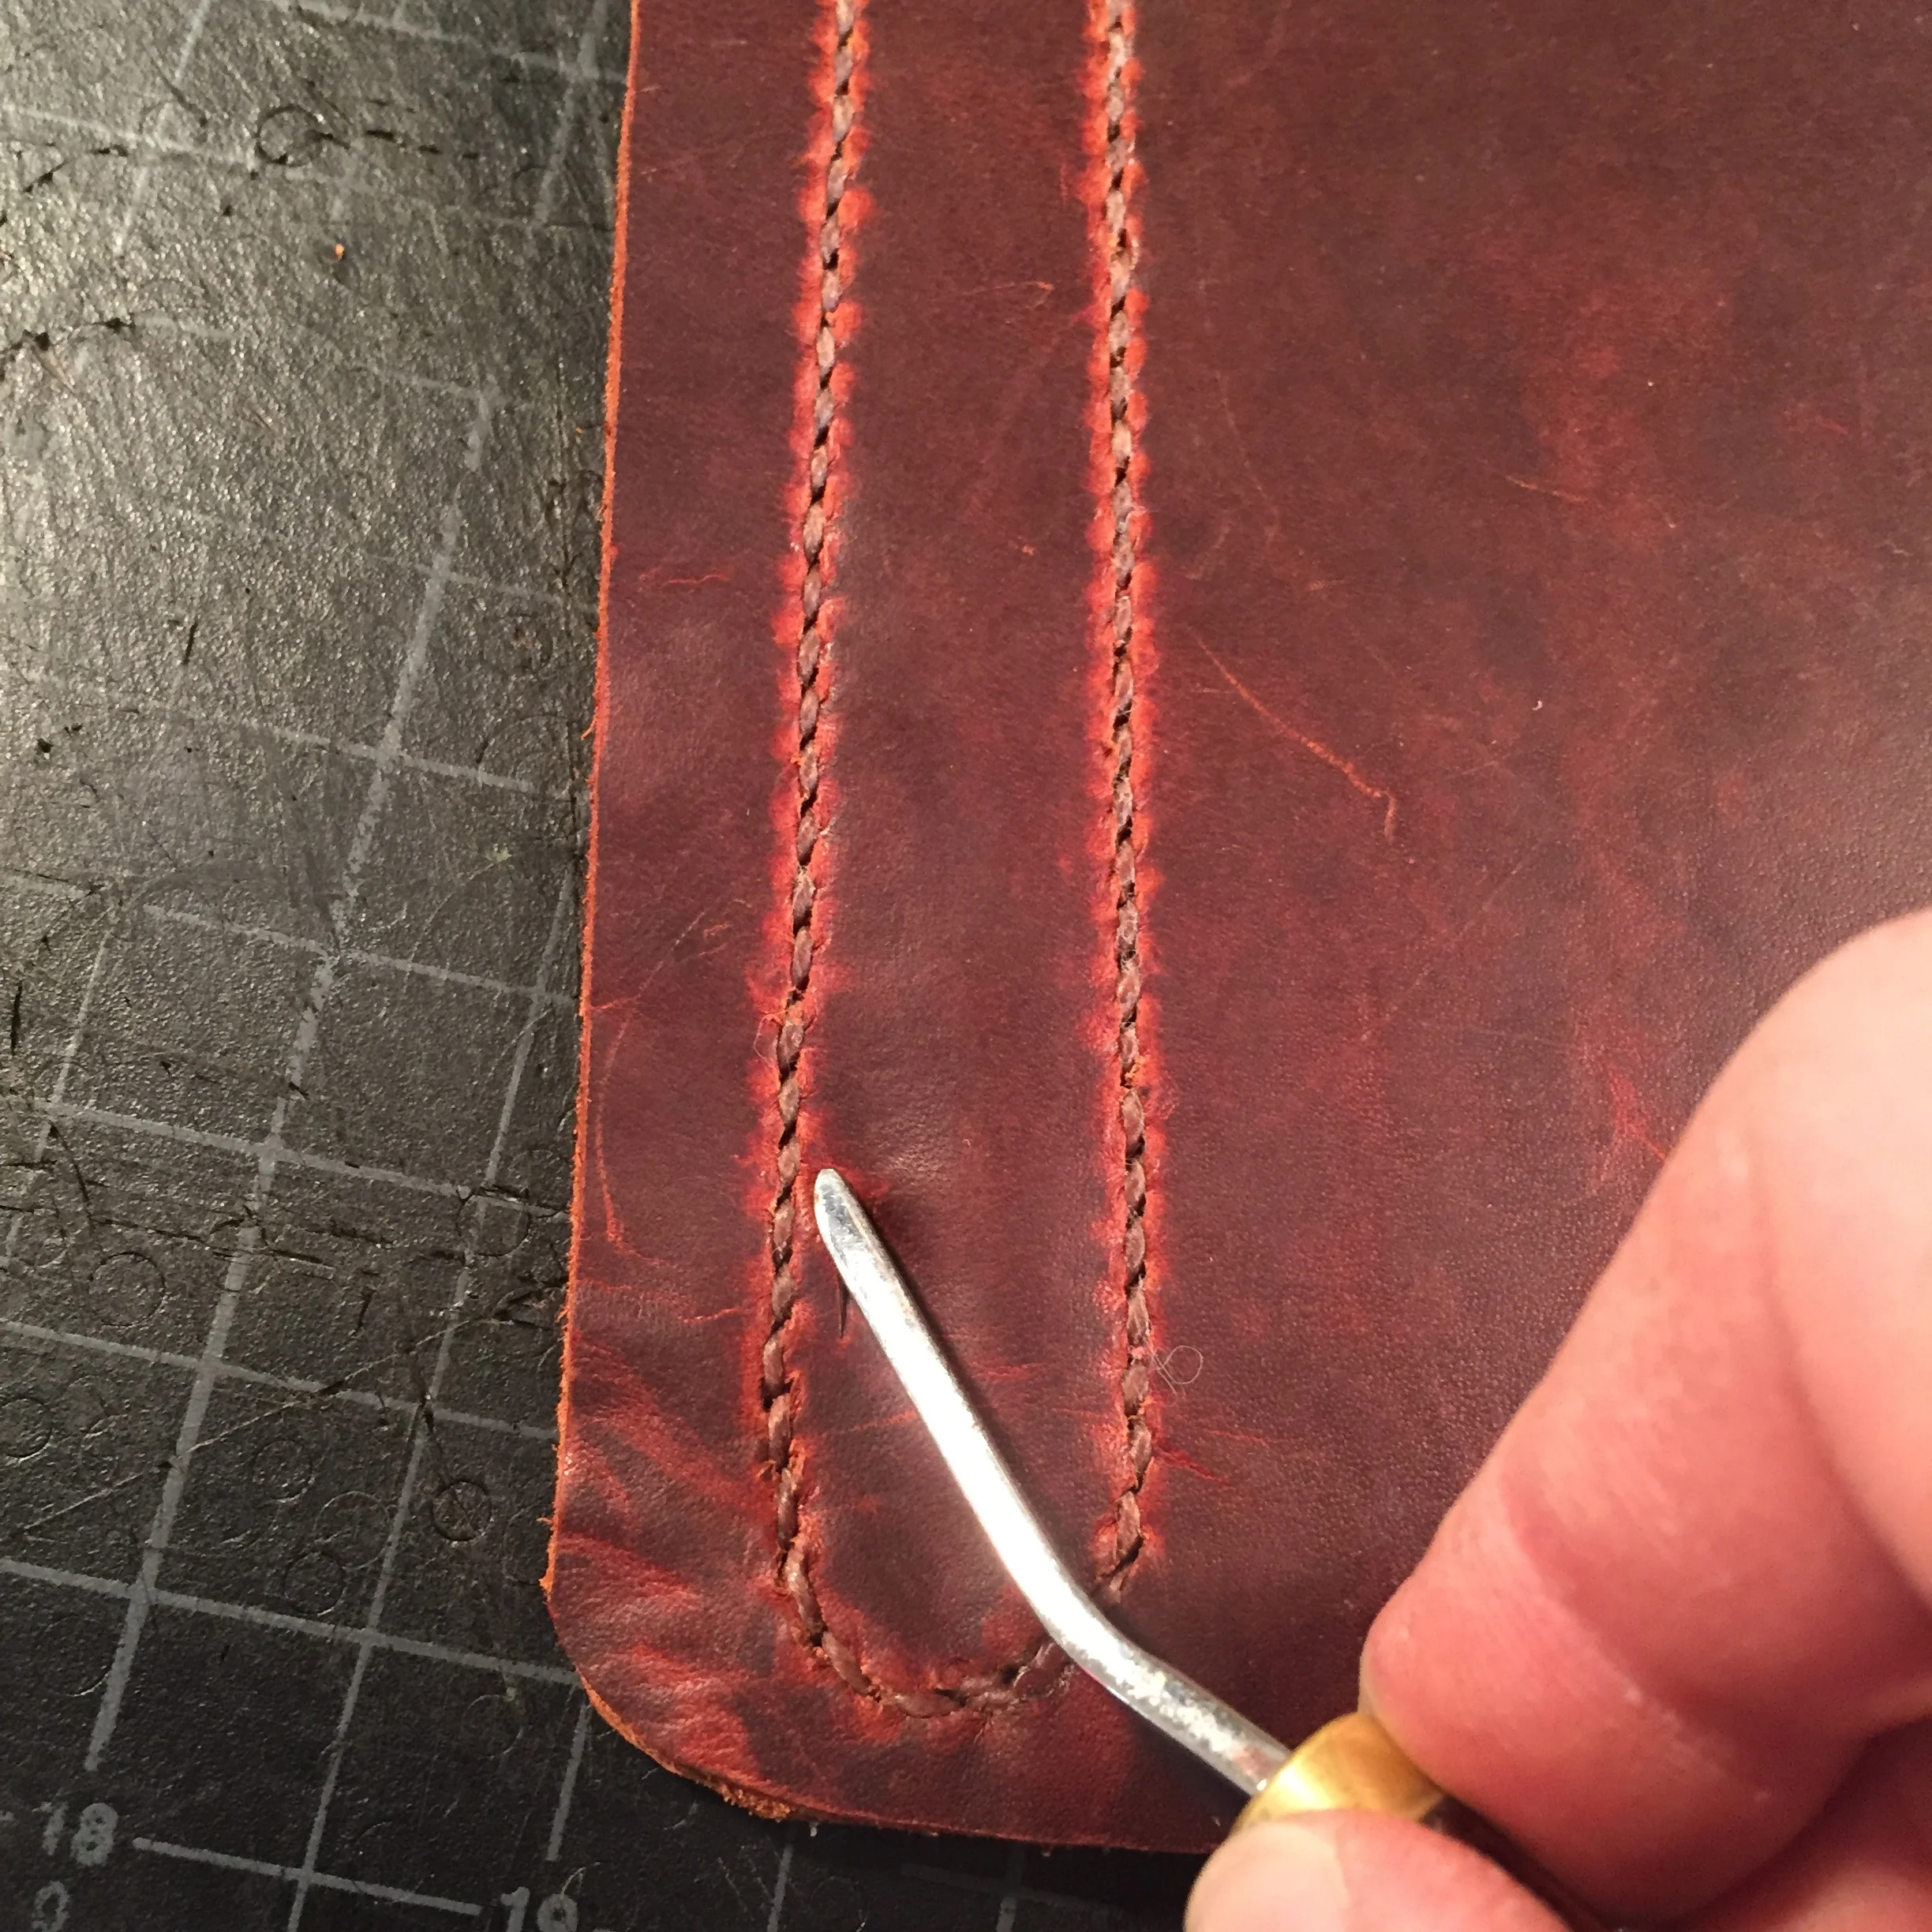
By using a Common Edger, the lining can be cut away with precision.
All done!
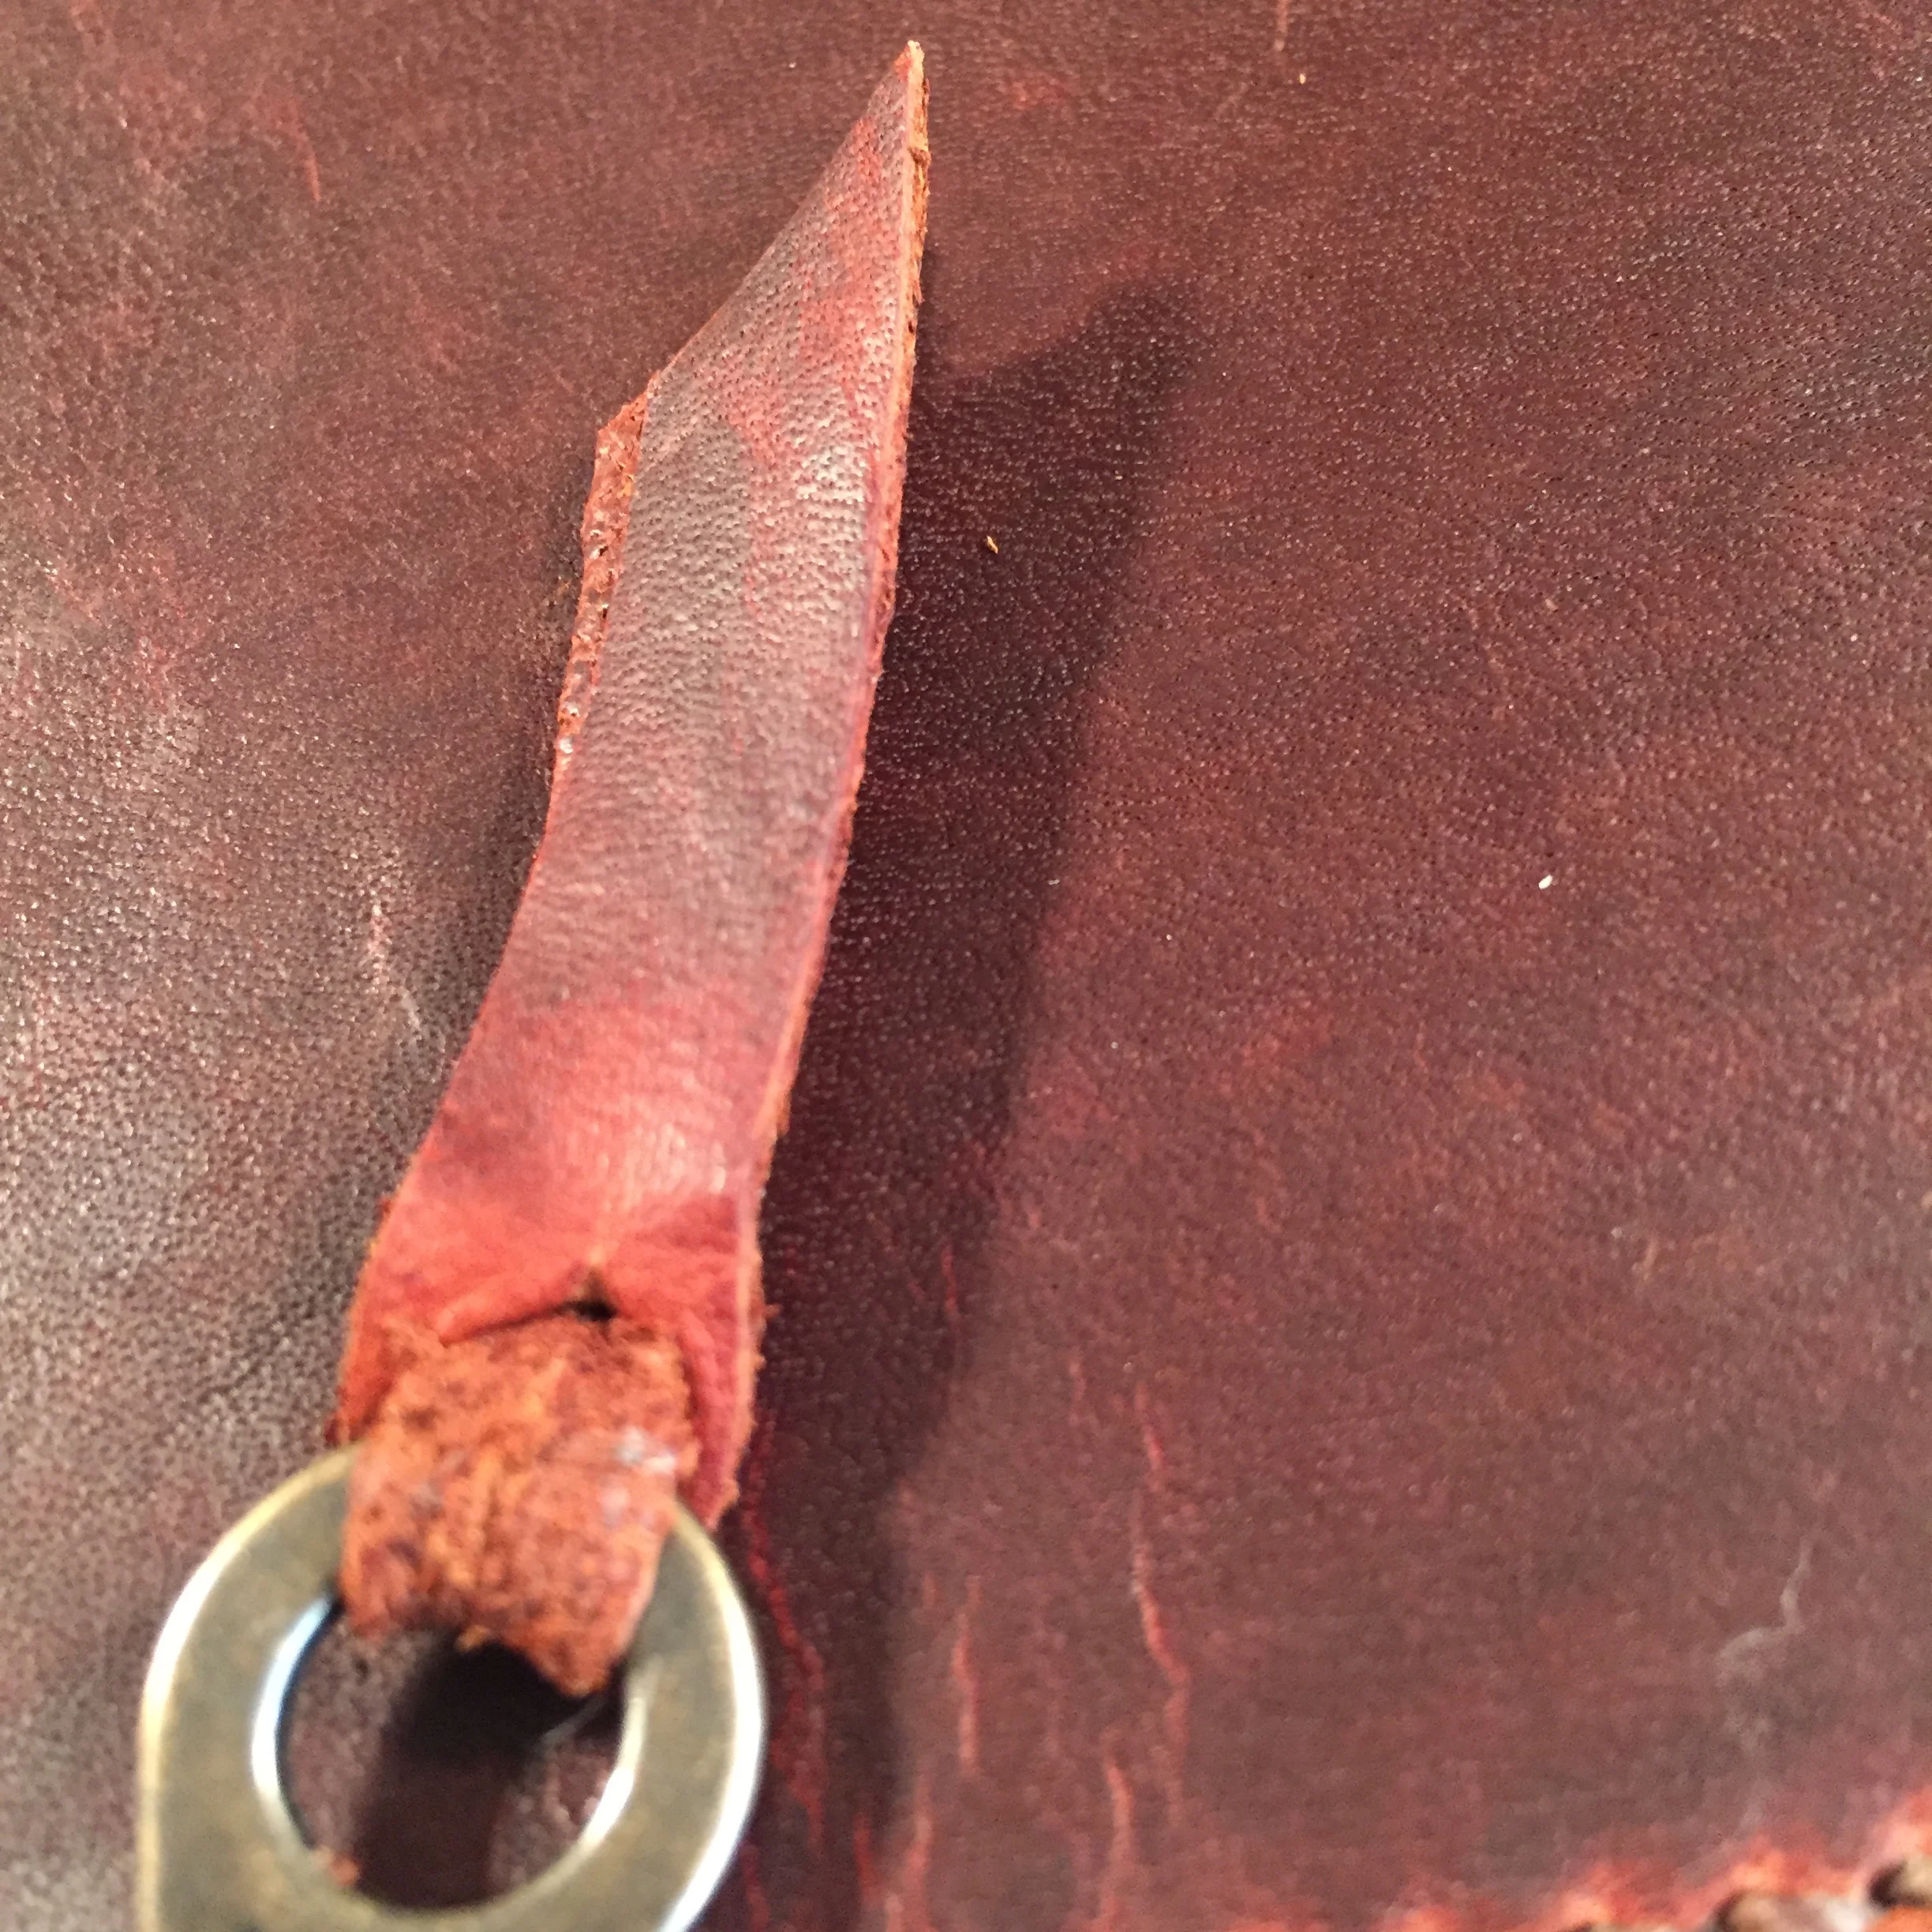
The piece that was cut away can be used to make a little pull tab for the zipper pull.
